|
|
Post by paulwaite on Nov 17, 2015 17:13:01 GMT
Sorry Henry, forgot to mention, that although its a Rally engine, its been converted to 12v electronic ignition using PX parts. I know what you mean about the zig zag firing points, via lambretta ones, but just checked again and there are none on this flywheel, that's why I thought the T shaped bit shown on the photo may be Vespa's version.
Also, plenty of magnetic charge left.
So wonder what this flywheel is. FYI, this rally engine did fire up with the other flywheel that is now on my Malossi engine.
|
|
|
|
Post by paulwaite on Nov 17, 2015 12:02:43 GMT
I have a spare Rally 200 engine that I bought a few years ago, sold as seen. With it came the lightened flywheel, as shown below. Now with my Rally 200 rebuild, on another thread, that already had a Malossi engine, I thought that I would put this lightened flywheel into that engine to gain a quicker throttle response. Which I did, but no spark. So I put the original flywheel back on the Malossi engine and the plug sparked and all is well. However, I've now want to put the spare Rally engine into a GS160, which is where the original Malossi engine came from, but would like to use this troubled flywheel that gave no spark above. Now if you look at the photo, there is a groove that looks as if its been caused by the stators rubbing. This groove goes across the firing point. So could this groove be the reason it did not create a spark. If so, is there anything I can do to repair. 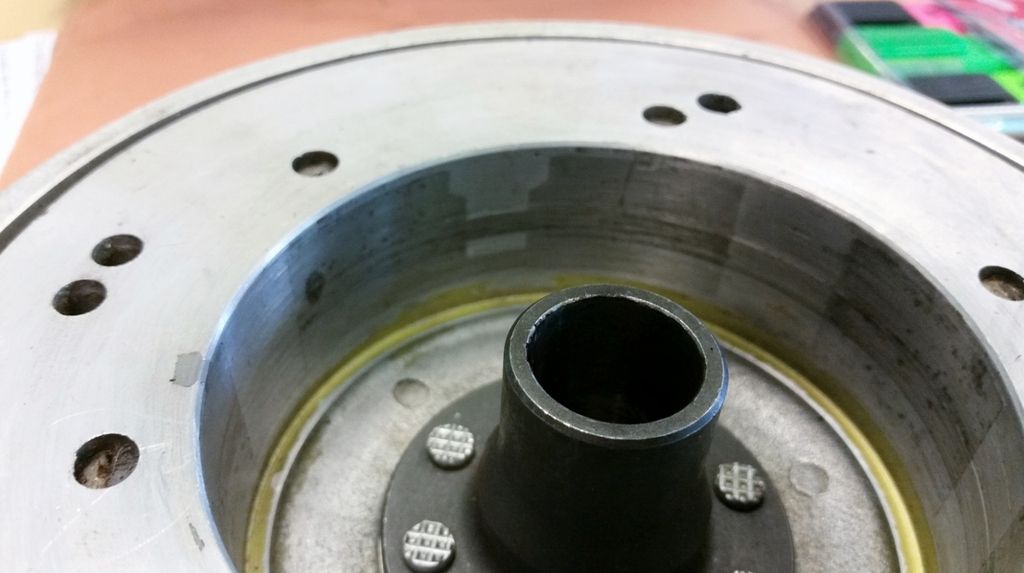 |
|
|
|
Post by paulwaite on Oct 14, 2015 12:15:17 GMT
Gave my Malossi barrel and piston to Mick Abbey (http://mickabbeytuning.co.uk/) to tune for a fast road touring, so I can't tell you precisely what he did, other than match the piston and stroke to the ports, raise the exhaust port to suit and smooth of the transfer ports. Now I hadn't used this Malossi engine for around 4 years, but comparing it now, with how I remember it, there is a marked improvement. This improvement is better acceleration, a smooth power curve right from low down revs upwards. And although I have the T5 final gear fitted, the top end (ie in 4th, still has loads of torque).
In respect of the Ky-Tronik and just to avoid any confusion, this is what I've done. If you have a look at the table above, I have set the static timing to 24 degrees and set the curve to 7. So when you kickstart the engine, it starts at 15 degrees to ease starting the rises to 24 degrees over the rev range shown to make the burning of fuel and therefore performance more efficient. Then as the revs build up, it advances the ignition to help in cooling. Or are am I misinterpreting what you suggested?
Over the years I've had M Tech and other boxes, but I'm impressed with the Ky-Tronik.
All the best
Paul
|
|
|
|
Post by paulwaite on Oct 14, 2015 11:58:25 GMT
Got the side panel rubbers from Beedspeed and from memory, they were over long and I cut them to suit. Ball end levers are far easier on the hand when it comes to the clutch bit. Must say, I'm getting to like Vespas, engine smooth and responsive, clutch and gear change like silk. And overall, the scooter is far lighter than my Lambrettas.
In the meantime, still not solved the fuel cutting out, it did it on the way home last night. But 30 seconds later it fired up and got me home. This morning did the same trip but I first of all loosened the fuel cap to eliminate any potential vacuum from a potential blocked vent hole, but the scooter blobbed on me twice within the first mile. But again, 30 seconds later, off I went for an interrupted 3 more miles to work.
Probably take out the fuel tank this weekend and check that the fuel pipe is not coiled awkwardly and make good. And check the internal of the fuel tap to make sure the rubber hasn't slipped. Plus strip a GP engine that I seized last week and get a series 2 fired up to sell. Well, probably not all in one weekend.
|
|
|
|
Post by paulwaite on Oct 13, 2015 12:19:41 GMT
Just to give an update for all interested or those who want to know.
Following on from setting Curve 7 and still in the experimental mode, I drilled out the airbox as shown in the sticky. The 7mm hole above the main jet was there already, so it was just the 5mm hole over the pilot jet. Then I thought I would just see what main jet that I had installed. Thought it was a 130 one, but turned out to be a 125 main jet that I ran with this Malossi engine before had the ports tweaked. Anyway, put in a 130 main jet and did the plug chops with perfect results. Although the 3/4 plus throttle range in 3rd gear was a bit hairy when it came to ignition off and clutch in.
Now since drilling out the air box and the 130 main, the scooter pulls great, with plenty of torque and acceleration, without having to find a power band. To date, I'm a lammy person, but must say, I'm impressed with the smoothness of this Vespa engine, albeit I seem to have the Malossi rattle, which worried me until someone told me it was normal.
Will get it dynod over the next few weeks to give me the confidence that I have got the jetting correct.
|
|
|
|
Post by paulwaite on Oct 13, 2015 12:06:53 GMT
Thanks for replies. On Saturday, chopped off 60mm from fuel pipe and checked out carb and jets, which were all clean. And today, I've come to work on it and so far its running OK. I suppose the test will come when it switches over to reserve, or if I run the carb dry and see what happens then. In fact, might do the latter within the safety of my drive so that I don't have to push it home. As for other comment, which has disappeared from this thread, if the fuel side doesn't solve it, then I will look at the ignition system, but thanks for your comment. But its a re-wired stator, with new pickup and new Ducati CDI. But what made me think fuel pipe is from when I re-built it. For instance, when I was ready to give it the first fire up, it didn't. Checked spark plug which was dry and had plenty of spark. Took fuel pipe off at carb and no petrol. So after taking ages to get the tank in place, or the fuel lever, I took the tank out, suspecting the new SIP tap. But once the tank was out, the fuel poured out of the rubber fuel pipe. Just saying all this in case anyone else has the same issue And note Vespasco, that I've now fitted the ball end levers. One thing that I learn't from the pointed levers was arthritis in my clutch hand 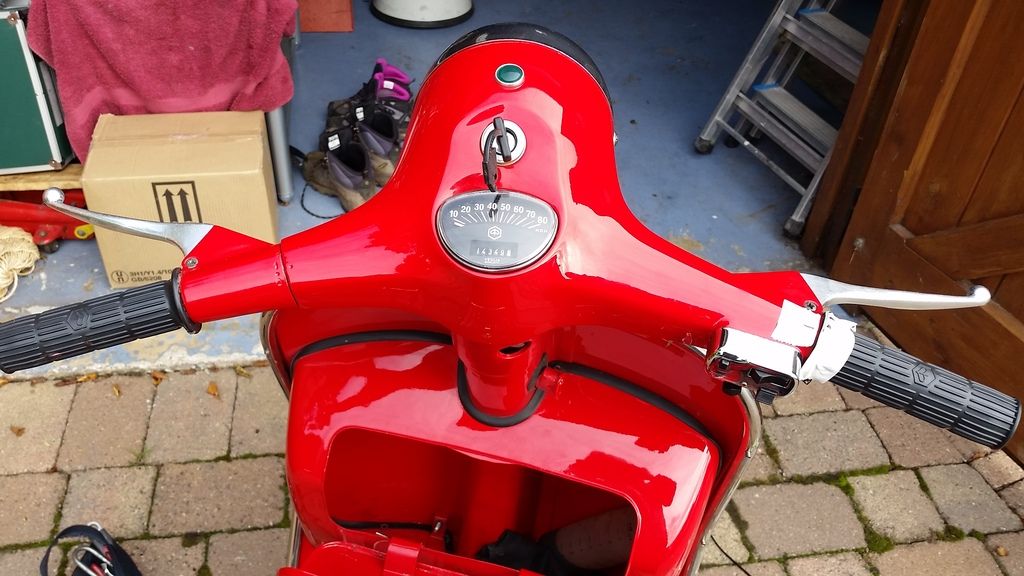 |
|
|
|
Post by paulwaite on Oct 10, 2015 9:45:19 GMT
As in a previous thread, this is the new Rally re-build with new SIP fast flow tap and new 24 inch long thick rubber fuel pipe (6mm int dia). But on a couple of occasions fuel has stopped flowing and I've ground to a halt, which doesn't look cool as you are stood at the road side looking a dork and pretending that you are waiting for someone. It will kick start and tickover, but not enough fuel to rev. But after a couple of minutes, with engine off, the carb must fill up and I'm off again. Sometimes for a couple of miles, sometimes longer.
FYI, fuel tank can be near reserve or full up and all filters on carb are clean.
Going onto the fuel line, its thick enough not to kink, but at 24 inch, it did look too long as I coiled it into the frame. But would this length of pipe cause an air lock and therefore, should I cut a length of the fuel pipe off. By the way, the 24 inch length came from a Vespa recommendation site.
Many Thanks
Paul
|
|
|
|
Post by paulwaite on Sept 15, 2015 11:37:30 GMT
Aaaargh Vespasco, didn't realise that I had got the levers wrong and in fact nearly put the ball ended ones on. Anyway, from my boxes of Vespa parts, (see photo's) that I bought and feel that I got done at a storage wars type bid, I've dug the ball levers out, so that's a bit of a positive on the stuff that i bid for. So this weekend, I'll get the levers swapped over. Boxes of spare parts 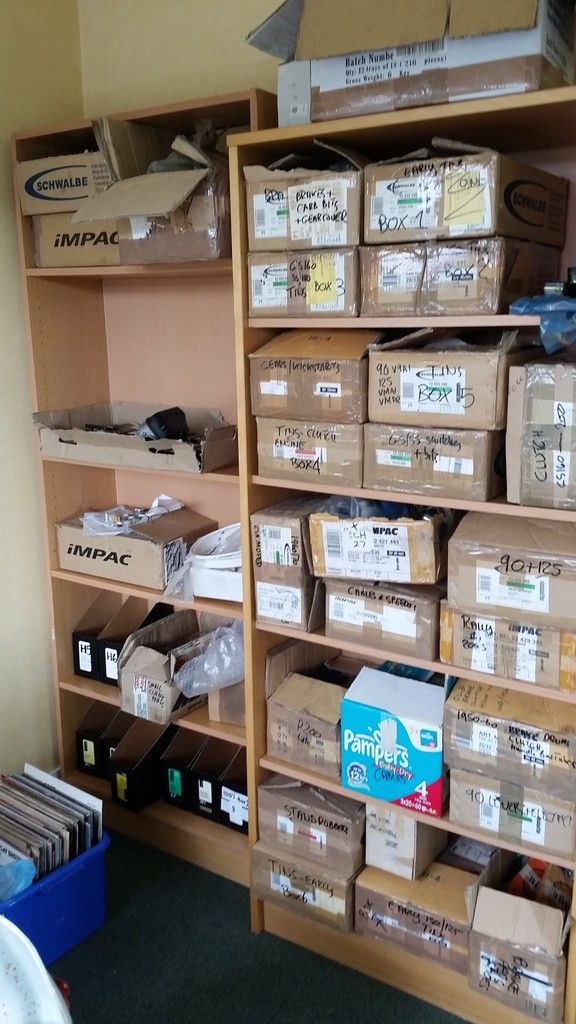 Ball end levers and straight levers with historic price tag 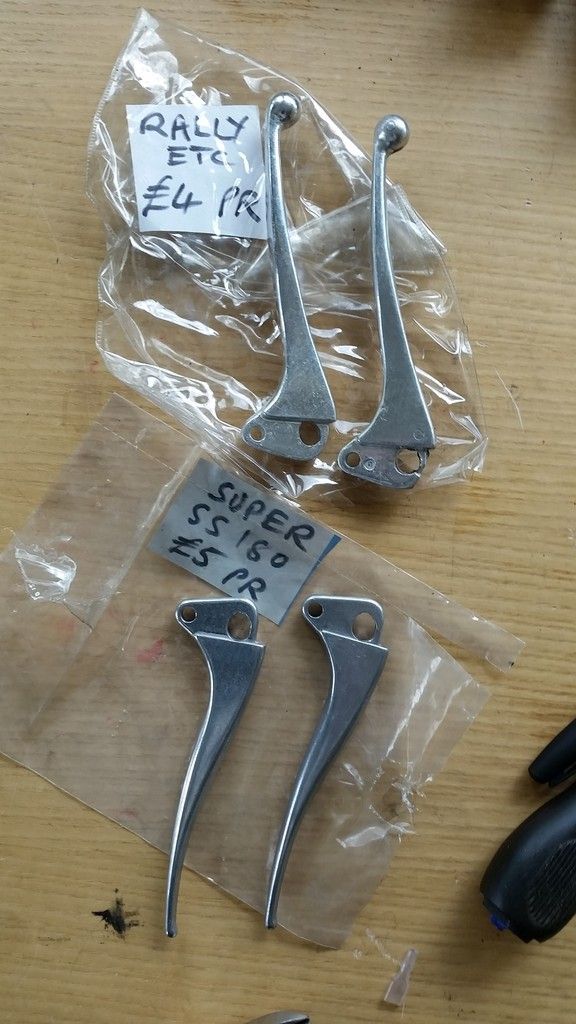 |
|
|
|
Post by paulwaite on Sept 14, 2015 13:03:59 GMT
Hi Henri The table below gave me some idea on the mapping for my tweaked 210 malossi with standard up jetted carb and BGM BigBox exhaust  So my original mapping was as below, using curve 8 and that's when I got the slightly lean plug chop. 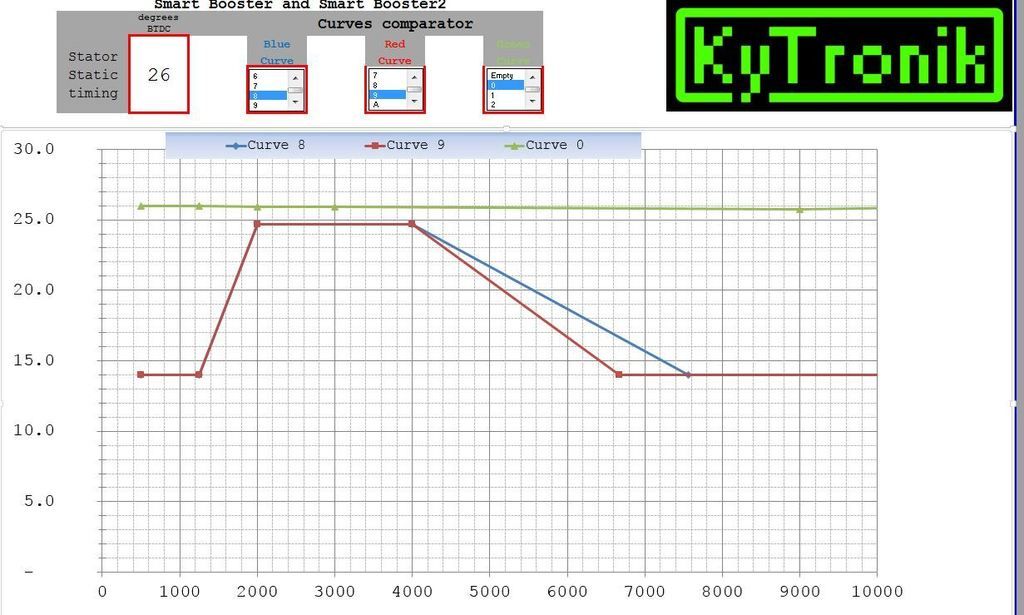 Then I had a re-think that my setup may not be a street racer. Although I have a tweaked further malossi cylinder, I still had the standard carb, but upjetted to 130. Also, although the BGM BigBox may be an improvement over the Sito plus, its still not a big expansion pipe. So over the weekend, I changed to the map below, running on curve 7. Initial chops upto 1/2 throttle look better, but I'm still in the dabbling mode. But thanks to you and Vespasco for the head up on Vespa atomizers, all interesting reading that I have stored for later. 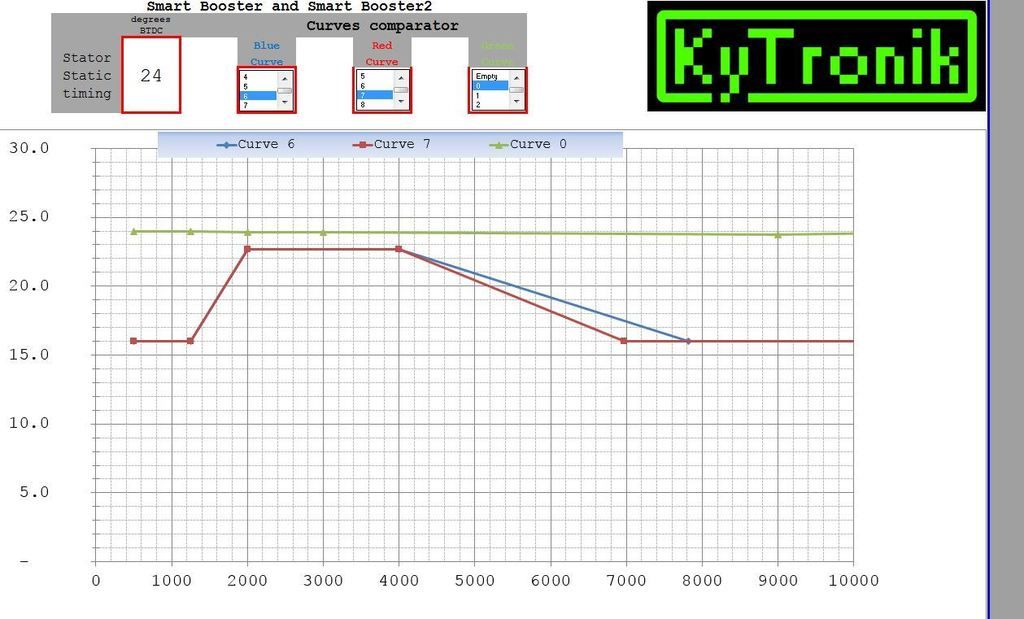 |
|
|
|
Post by paulwaite on Sept 14, 2015 12:46:46 GMT
Hi Vespasco, rather than clutter up this thread with lots of detail, see this link for the build story, that i have finally updated today scooterotica.org/forum/viewtopic.php?f=10&t=33228But below are 3 photos taken after I finally rode it home at the end of August, after building it in my first floor office, much to the amusement of others. 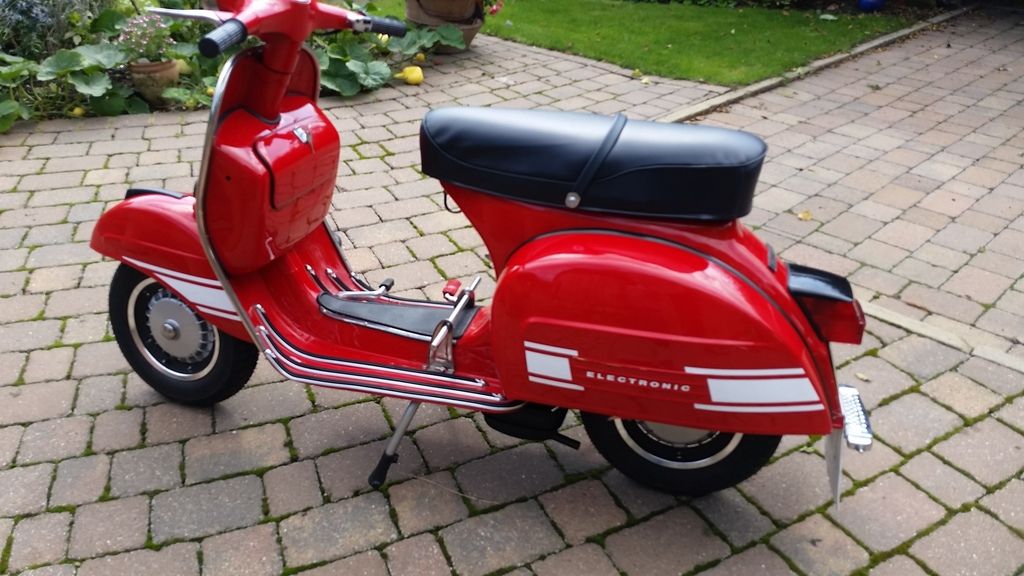 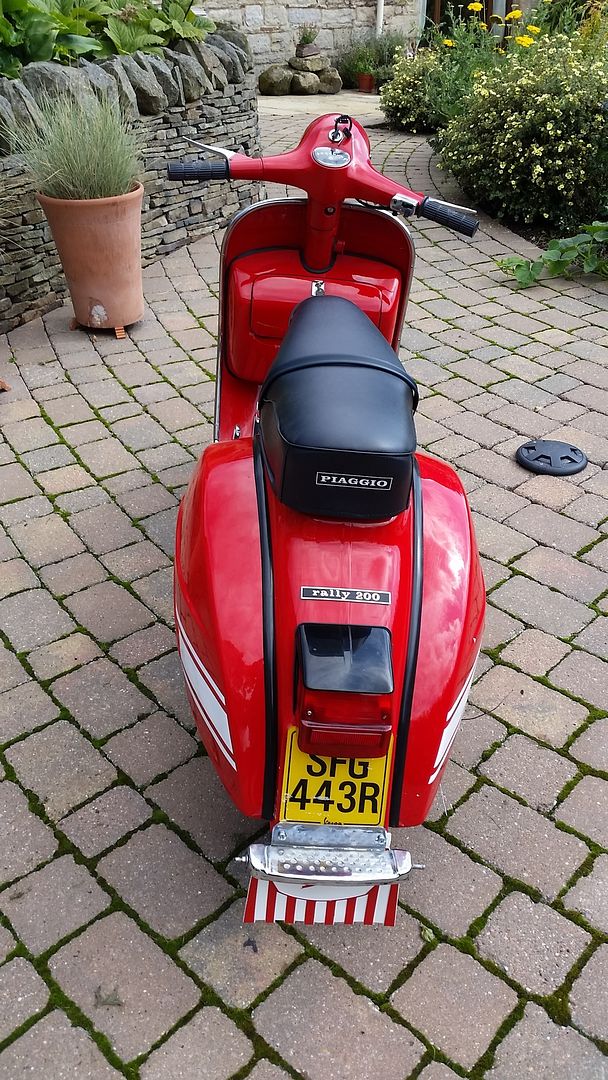 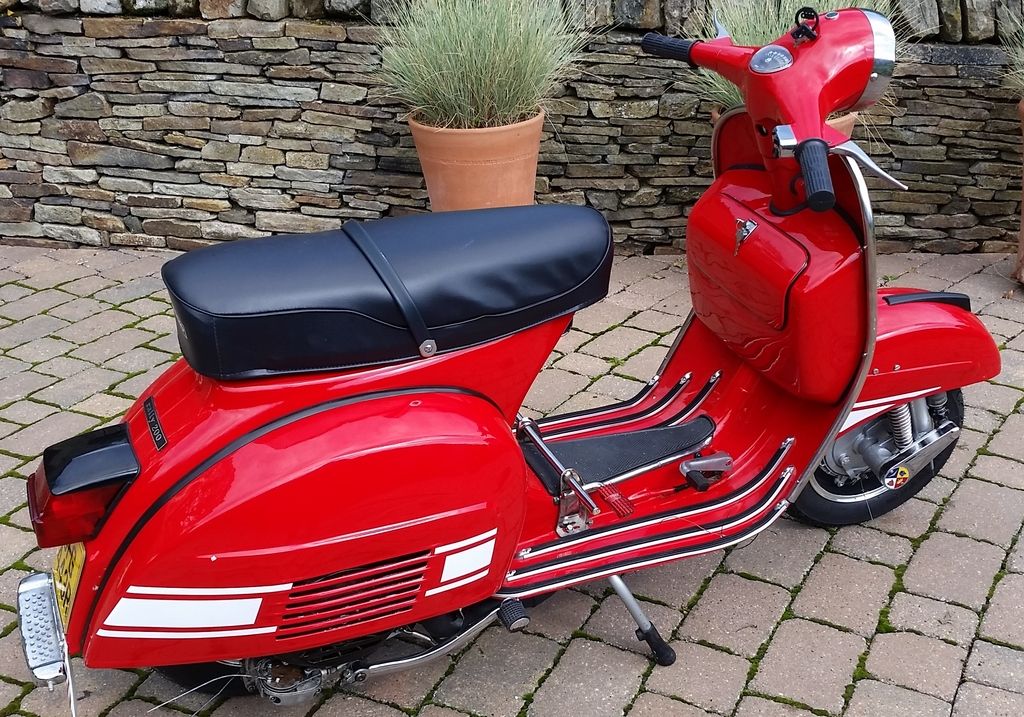 |
|
|
|
Post by paulwaite on Sept 10, 2015 14:55:10 GMT
It passed today, road tax sorted and my MOT man is strict.
Actually, when you stand back, its now almost parallel with running board.
So out with lads tonight after tweaking carb a bit more
|
|
|
|
Post by paulwaite on Sept 10, 2015 12:22:37 GMT
This is the standard 24/24 carb with a 130 main jet being the only difference to the stock carb, ie with a BE3 mixer. Before I had the Malossi tuned, it ran well with a great plug colour. Since then the barrel ports have been tweaked, I have changed exhaust from a Sito plus to the BGM big Box and set up Ky-Tronik ignition.
In this form, it runs great with plenty of pull and feels right and the tickover sounds and feels right.
But just done plug chop at 1/2 throttle and its probably just a bit too lean. So to richen up this low end, do I change the mixer tube to a BE4, or should I be looking at something else in the jetting zone.
|
|
|
|
Post by paulwaite on Sept 9, 2015 17:54:43 GMT
It does look better in real life and probably has gone higher. Anyway, MoT tomorrow!!!!
As for your measurements, sorry for not getting back, but mine are spot on with yours.
|
|
|
|
Post by paulwaite on Sept 9, 2015 11:12:09 GMT
They are aircraft quality high carbon steel Metric Aerospace Locknuts are small, lightweight, self locking, extremely strong and are used where space is at a premium. The upper threaded portion is deformed to produce the self locking action. See link below for an explanation www.aircraftfast.com/jet-nuts.htmUsed them to fit my SIP rims to this rally as the SIP nut would not grip enough thread. 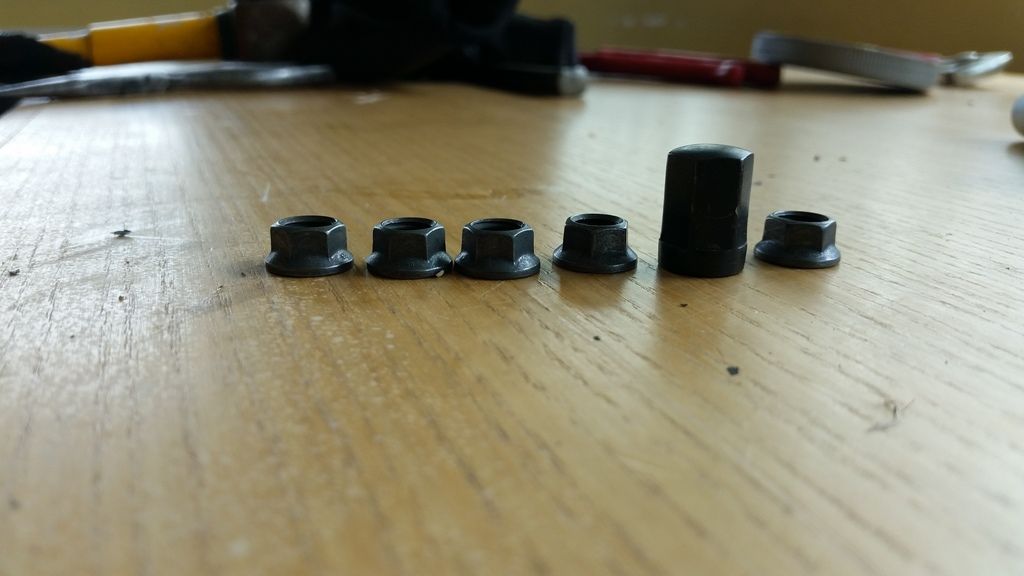 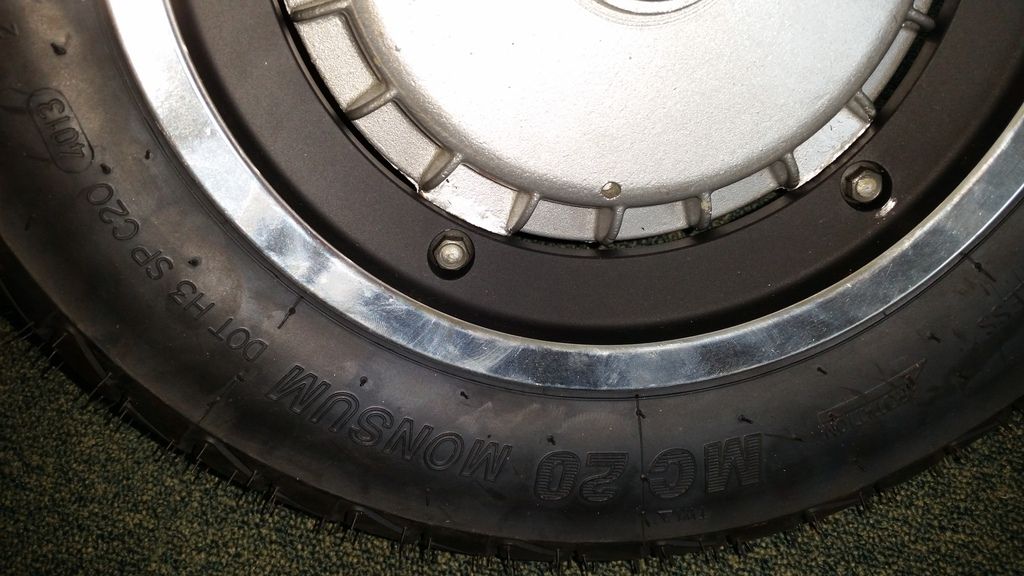 |
|
|
|
Post by paulwaite on Sept 9, 2015 8:58:17 GMT
Thanks for all your replies, but problem with stand now sorted. Turned out that the stand that came with the rally was in fact for another type of vespa. It was a lot wider and shorter, probably for a PX But before I came to that conclusion, I was not happy with the existing stand as it not only fouled the exhaust, but the scooter leaned too far over when it was on the stand and things like that bug me. So for the sake of a few pounds, I ordered a new stand and fittings. Anyway, last night I gingerly fixed this stand and found that it cleared the exhaust. (See photos's below) Well, enough to satisfy me. In addition, the scooter sits vertical on the stand and without any wobble. May have to change rubber feet for alloy, but brackets do also sit on the side of the ridge Moral of the story is that not everything that comes with a scooter, is original. Also took it for a run last night with my re-fitted soaked clutch corks, tuned mallosi 210 and Ky-Tronik ignition and it pulled like a train, with great acceleration. Not upto TS1 standards, but there again, its only running with the standard upjetted carb. 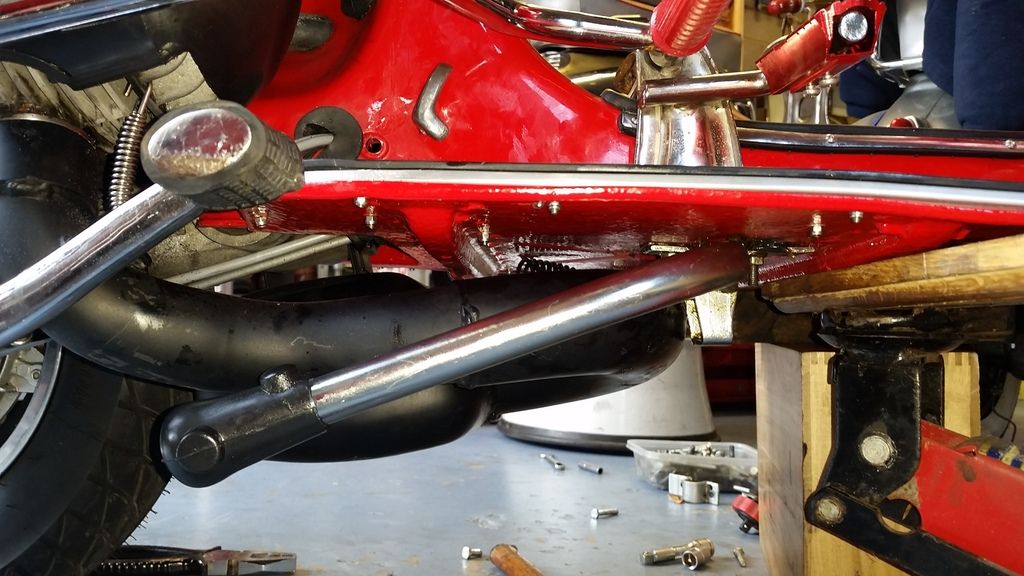 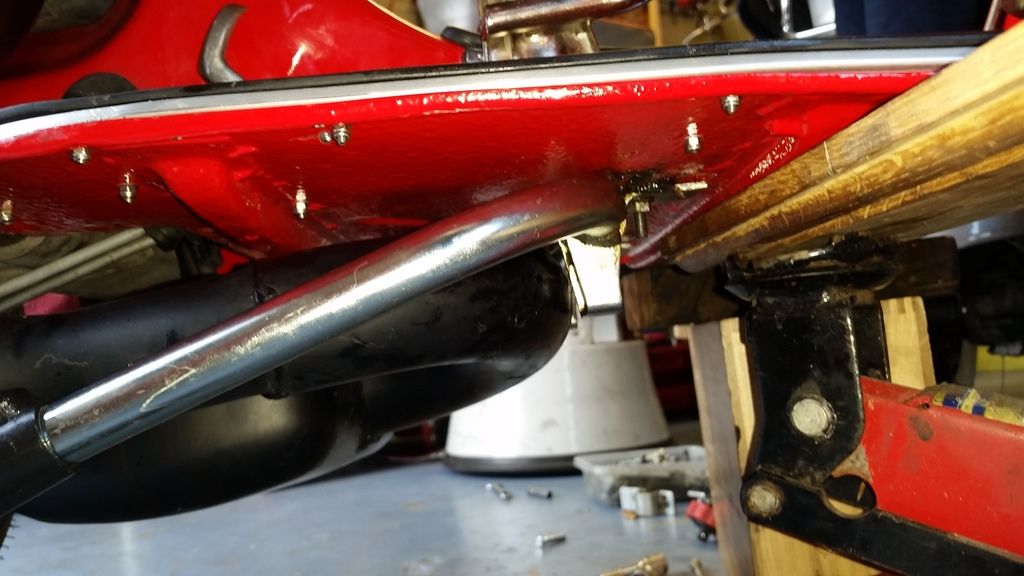 |
|
|
|
Post by paulwaite on Sept 7, 2015 10:02:08 GMT
Sorted now.
Took the clutch out Friday and cork plates were quite dry. Although they had been soaked gear oil previously, they have sat in the engine, on the garage floor for the past 9 months. So again soaked them for 24 hours and clutch works perfectly.
Must admit to having a scary moment getting the woodruff key in place and then the clutch to locate with all the warnings that if it dropped out and fell into the gear box that it would be a complete strip down. But despite fumbling fingers, got past that trauma.
Bolted clutch back onto shaft with K Nut, which I'm a big fan of these nuts
|
|
|
|
Post by paulwaite on Sept 3, 2015 11:42:57 GMT
New clutch coming out tomorrow for a good inspection. And bolted back up with an M12 K nut, rather than the knuckle scraping castle nut
|
|
|
|
Post by paulwaite on Sept 2, 2015 7:52:03 GMT
Thanks for the replies and there does seem to be some merit in the positioning of the stand. But as you can see from the photos below, everything looked original. In re-building this Rally, I have used this link to make sure I am putting the bits together in the correct place and as you will see from this link, the brackets do butt up with the ridge. Therefore, I might look at different brackets, or at the least consider reversing mine, which may give me an additional 25mm (or 1 inch for those in the USA) of space. gallery.vespresso.nl/mr10/Rally200?page=11 So its got me thinking, have I used the correct brackets, but that what was in the bucket of stuff that I bought. Ahh, just re-looking at this link, it does look like I've got the brackets on back to front, so I may have solved it, let you know after the weekend. A few PhotosBack in 2010, brought this Rally and plonked it in my garage. But the previous owner had stripped it down some years previous 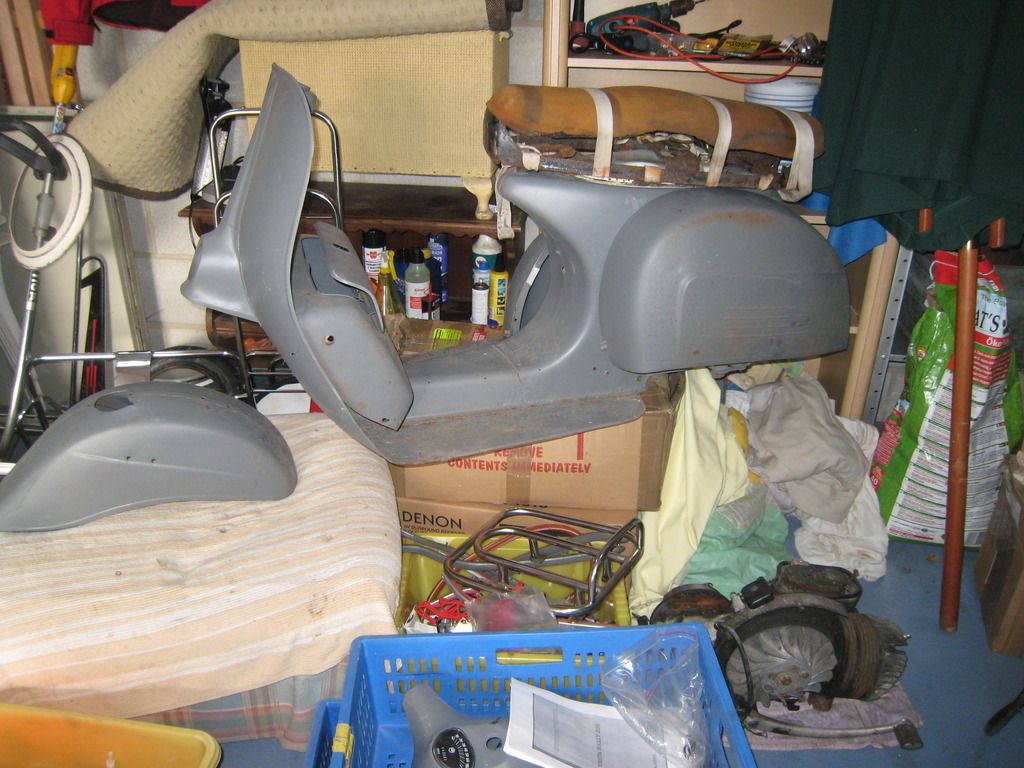 View from the underside showing where i wanted additional welding, together with the original holes for the stand 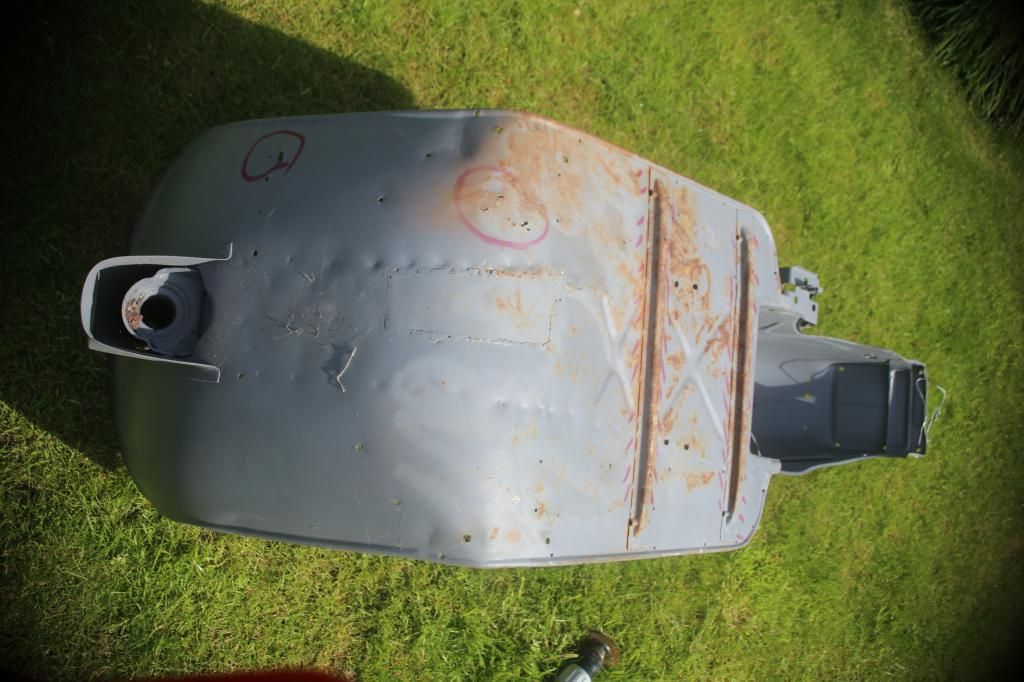 Rally now sprayed with original stand holes, should have done a dry fit then. 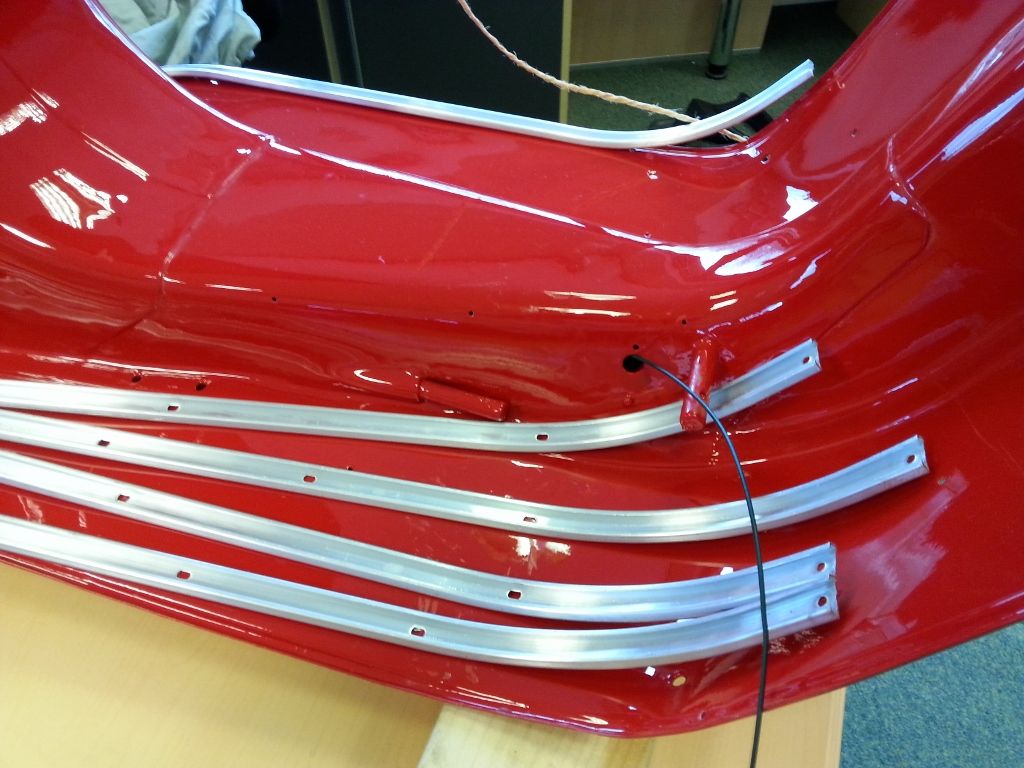 |
|
|
|
Post by paulwaite on Sept 1, 2015 8:48:28 GMT
To be honest, I have thought about a center stand. However, in the first instance, i have emailed Scooter Centre Koln, to see how they would overcome this issue, as there must be lots of others in the same situation, so it will be interesting to see their reply.
|
|
|
|
Post by paulwaite on Aug 31, 2015 10:27:11 GMT
Just finished building the Rally and the teething problems now need sorting. In this instance, the center stand fouls the BGM BigBox exhaust, as shown below, so it cannot fully retract flush with the running board. Cant seem to find anyone else on the web who has had this issue. Any suggestions, ie is there a different type of center stand available Thanks  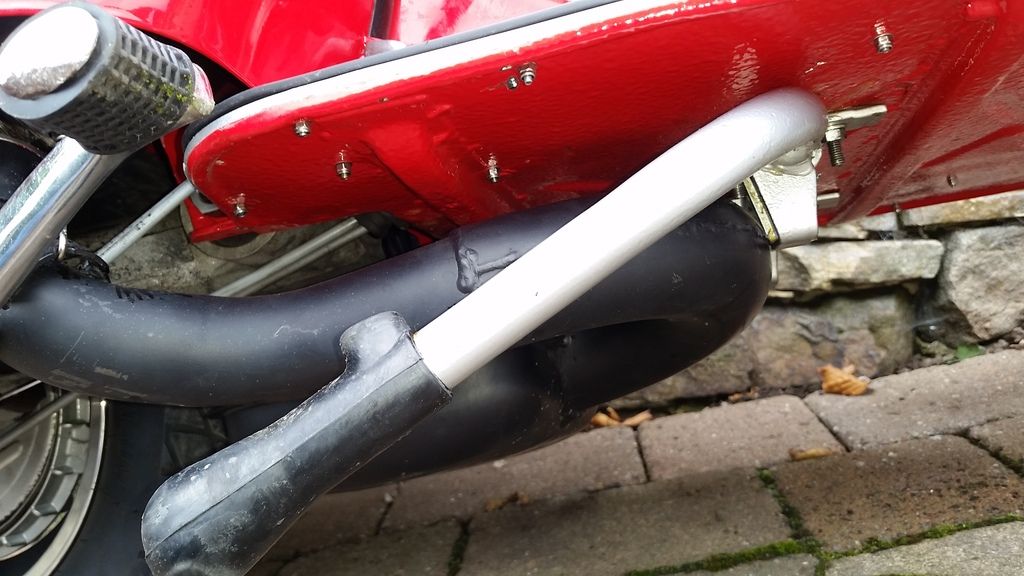 |
|
|
|
Post by paulwaite on Aug 30, 2015 10:33:58 GMT
P200 engine, that I have re-built with a standard Indian clutch. Soaked the plates before building the clutch and de-burred the rough edges. Then 6 months later stuck the engine into my rally. However, on letting out the clutch, it screeches, but pulls away OK, with no judder. And, although I had a full face helmet on, it did sound like a faint screech when riding for a 2 mile test run.
Have I missed something in the clutch re-build, or could the corks have dried out.
Thanks
|
|


