|
|
Post by bryno on Dec 26, 2007 16:16:49 GMT
I first posted pics of my '59 VBA 'garden find' back in July, thought it was about time I updated on progress.. As found by a mate of mine, thanks to the VCB identified as a '59 VBA which is similar to the later VBB/Sportique but lots of detail differences. It had clearly been in a major accident many years ago and abandoned, though apeared largely complete it had lots of little parts missing or beyond repair and the body was totally shot, apart from that, an easy resto! ;D 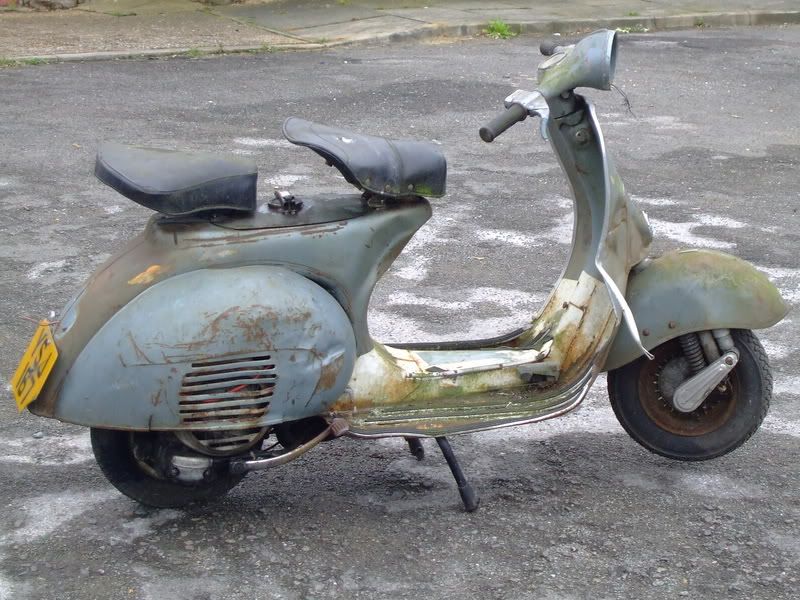 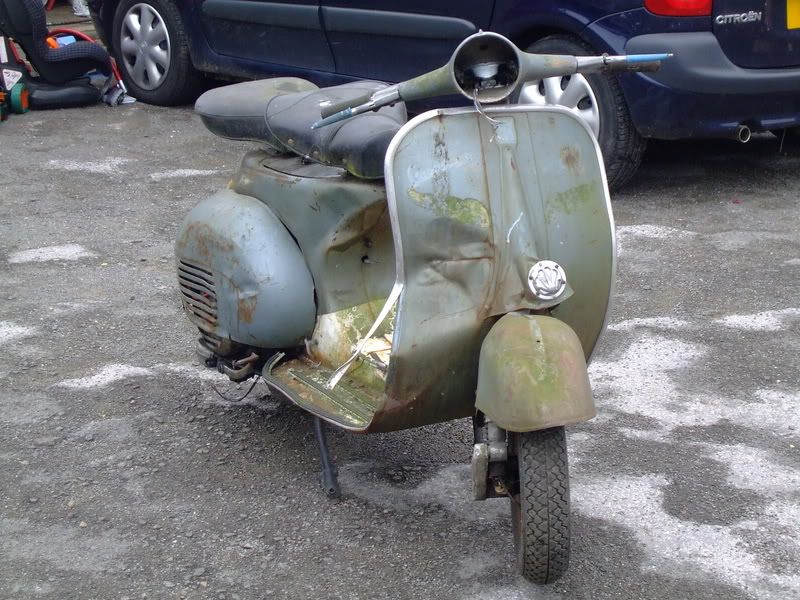  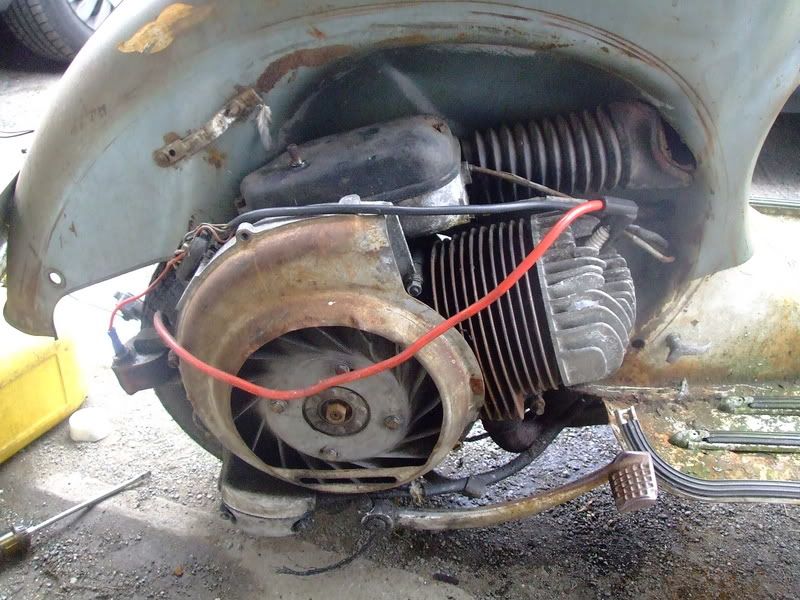 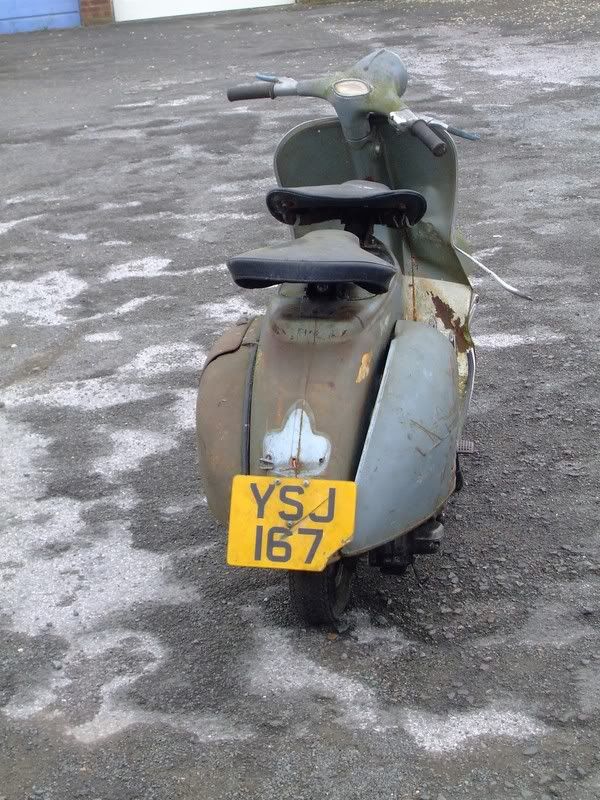 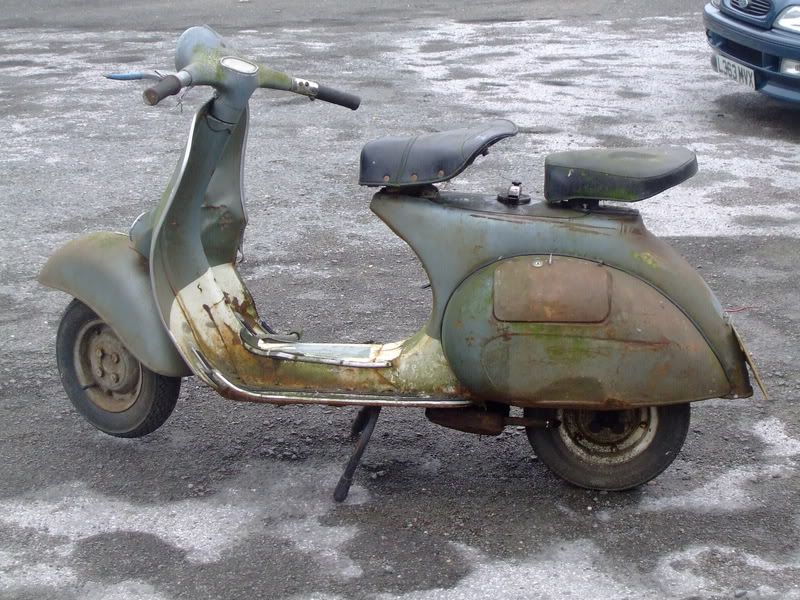 Having checked with the DVLA, seemed the scoot was not on the database and that number plate belongs to something else, bit of a blow as I need to go through the reg process, but undeterred I decided to crack on and restore it, I mean how hard can it be?  Body was very, very rough, in the end I bought a second VBB to use for parts as there was so much missing or unrepairable on the VBA, frame required some serious welding and new metal so I sent both frames to John McLauchlin who has the frame jig up in Cumbia.. www.vespaframejig.piczo.comNew floor was needed amongst other things.. 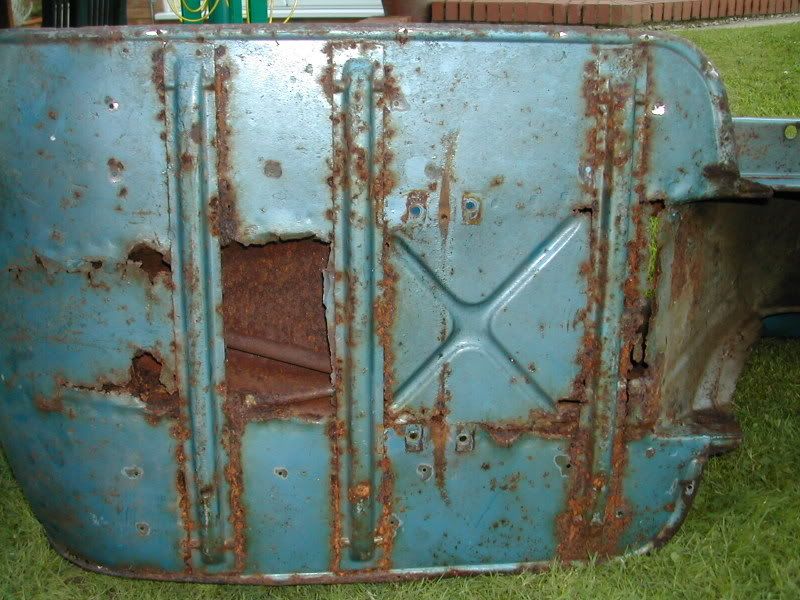 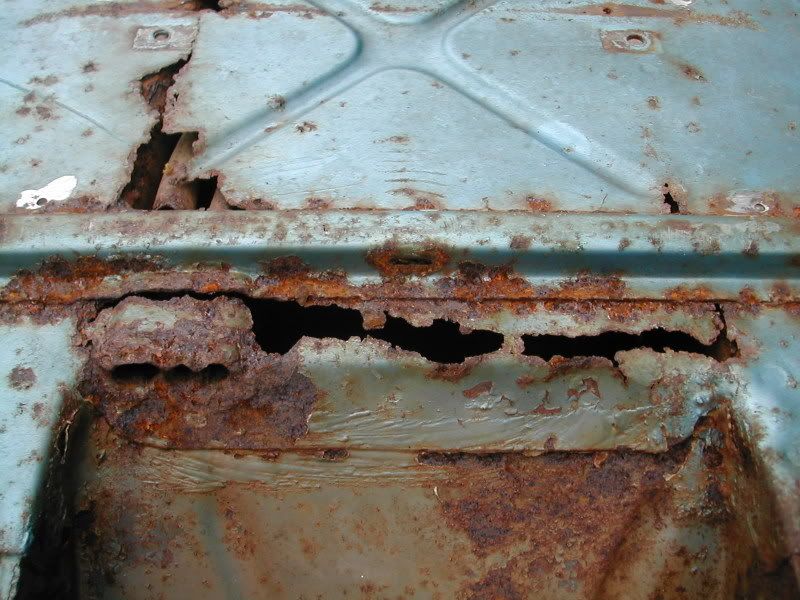  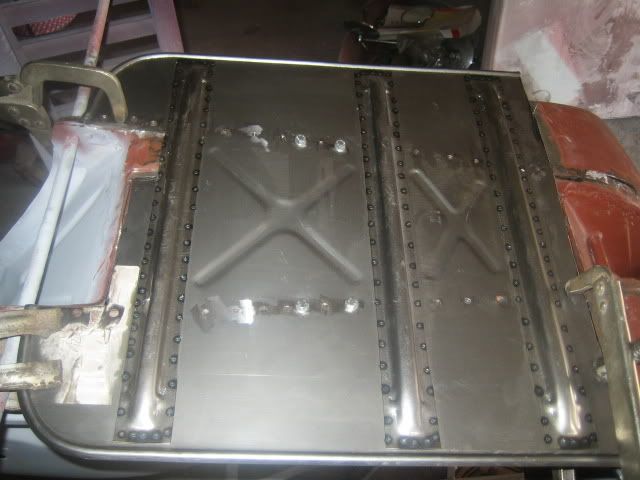 Frame returned after a few months hard labour by John, top job  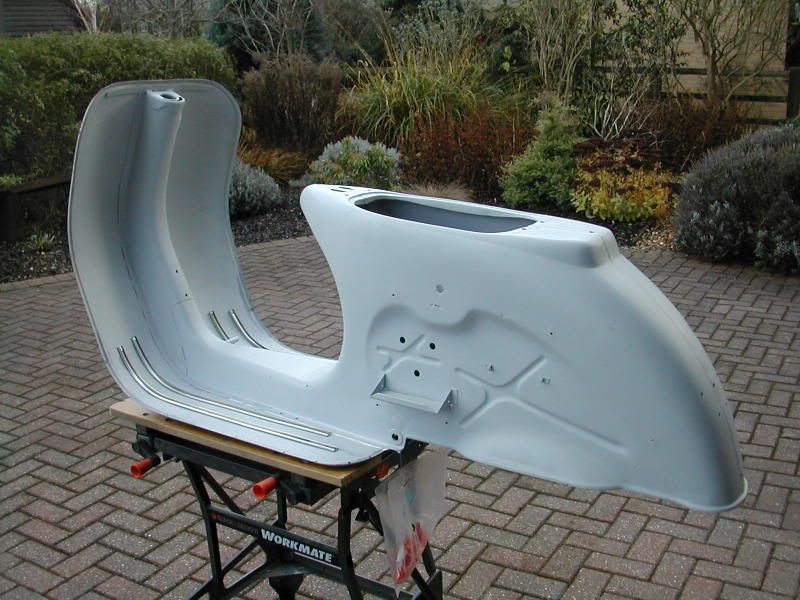 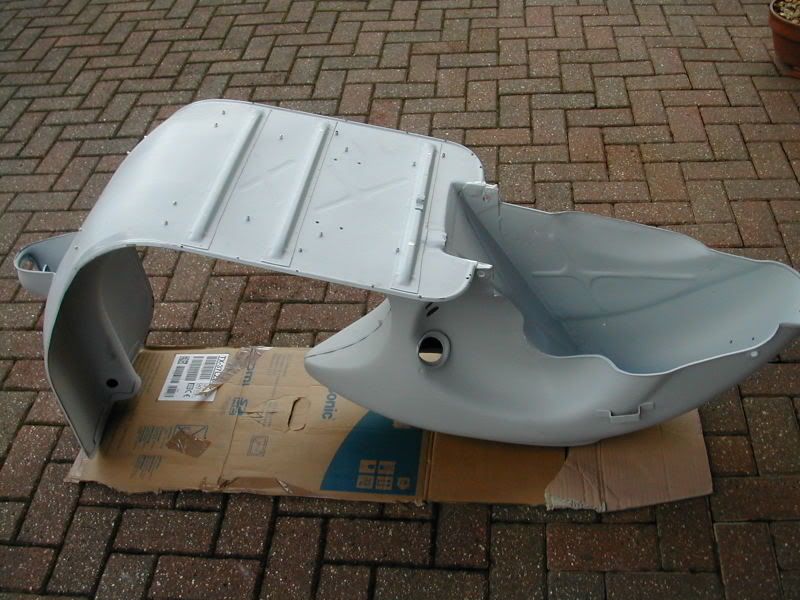 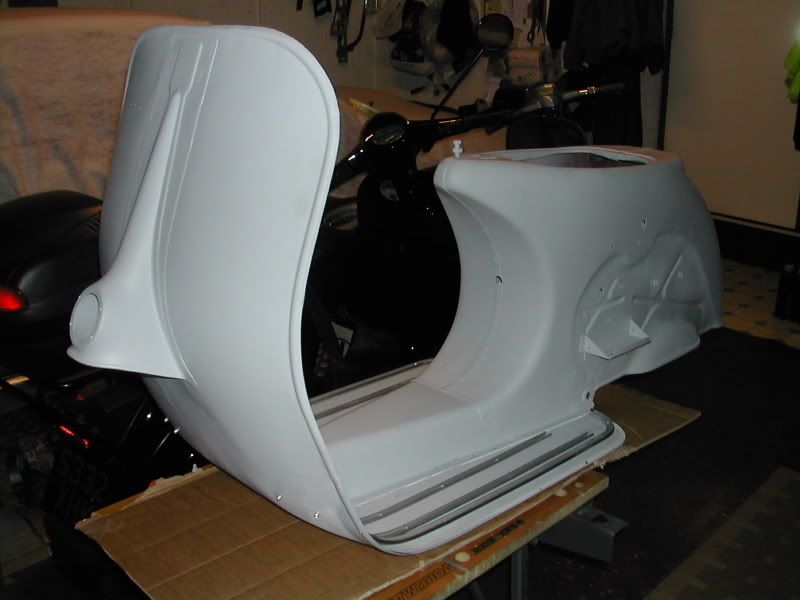 There is a load of filling and fine finishing to do, but it's essentally straight.. ;D In the meantime, I've spent the last few months on the rest of the scoot, there are many more parts than I ever imagined.. unique 'seamless' VBA bumber has been bashed back into shape and prepped for paint.. 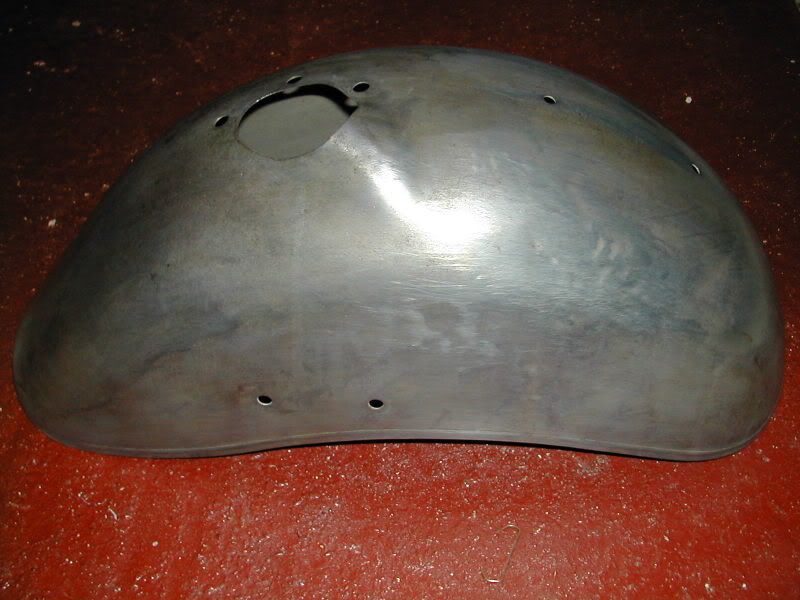 As have loads of other parts.. 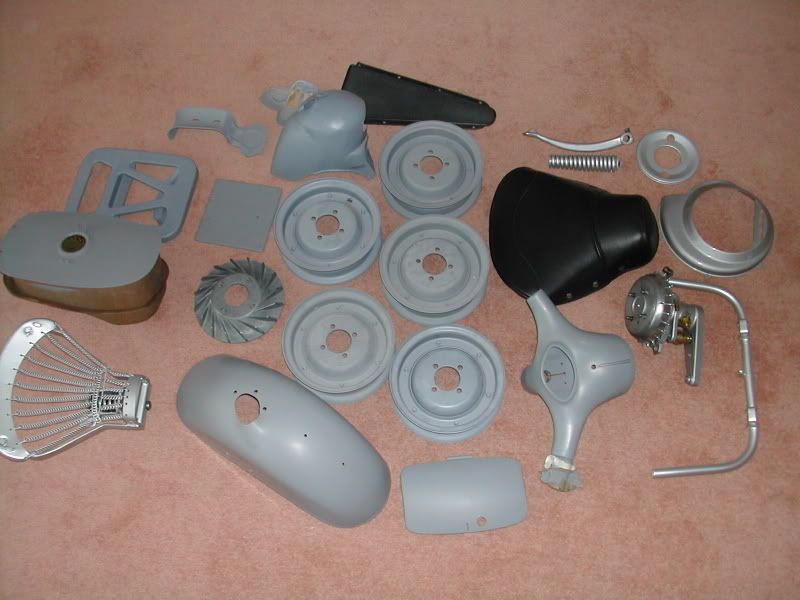 I've tried to retain as much of the original scoot as possible, fuel tank is also unique to the VBA (& earlier), was sooo full of rust but lots of acid and pebbles later and it's good enough to be reused. I'm going to retain the original single seat with rear flat rack, this is how it would have come from the factory, i may add a buddy seat sometime.. 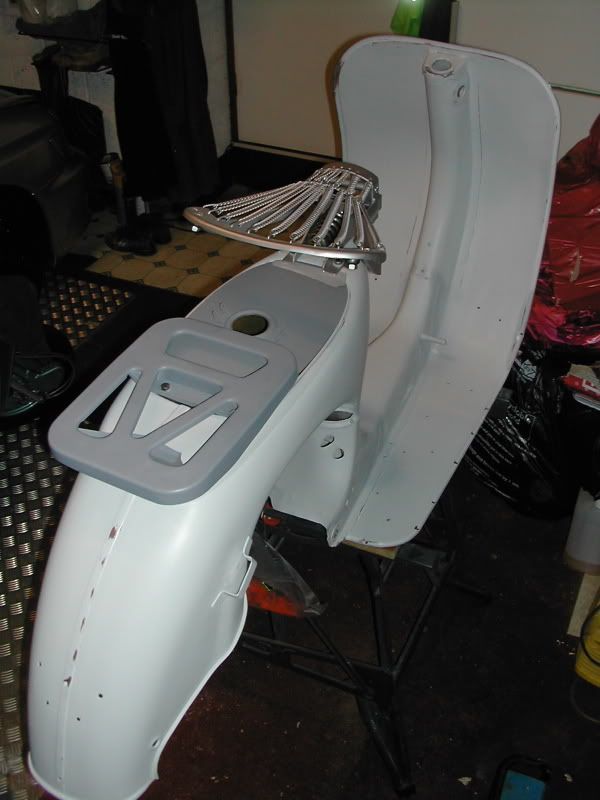 Against all advice, I'm sticking with the 8" wheels, forks are all refurbed now, and I've got 5 wheels to paint up, doing one set in the body colour and also a set in satin black, which I think will look pretty good agiainst my refurbed hub.. 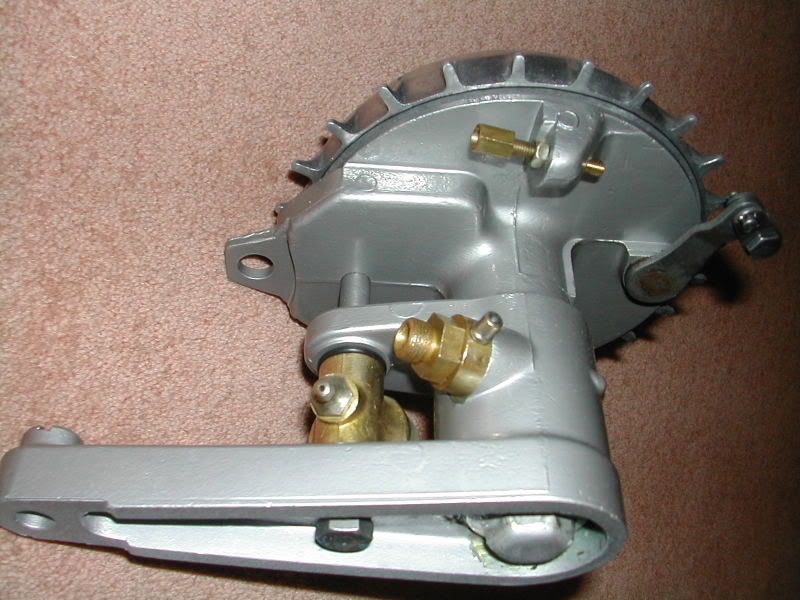 and whitewalls & centre caps ;D 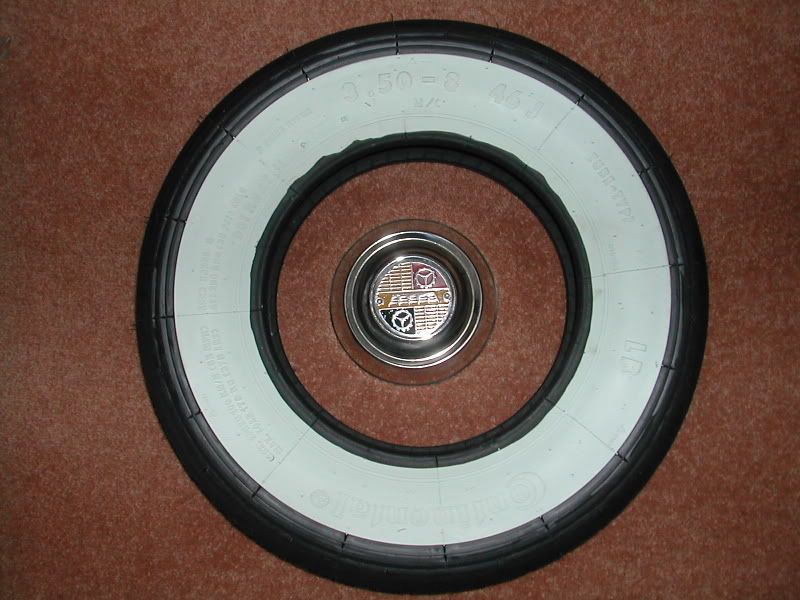 Are using an original speedo, just fitted a new chrome surround, not easy, but looks good.. 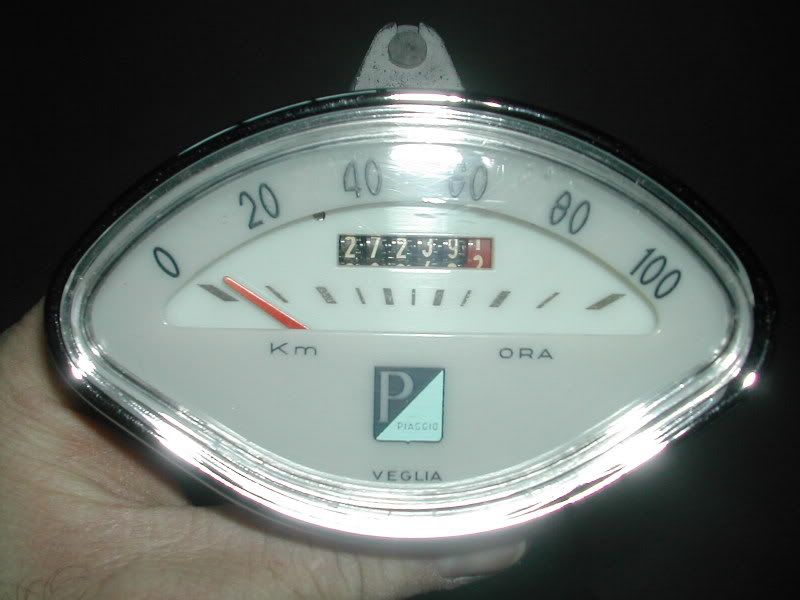 Engine is a bit of a mess, the original VBA 3 speed is beyond repair as the casings are damaged and will not seal against the crank  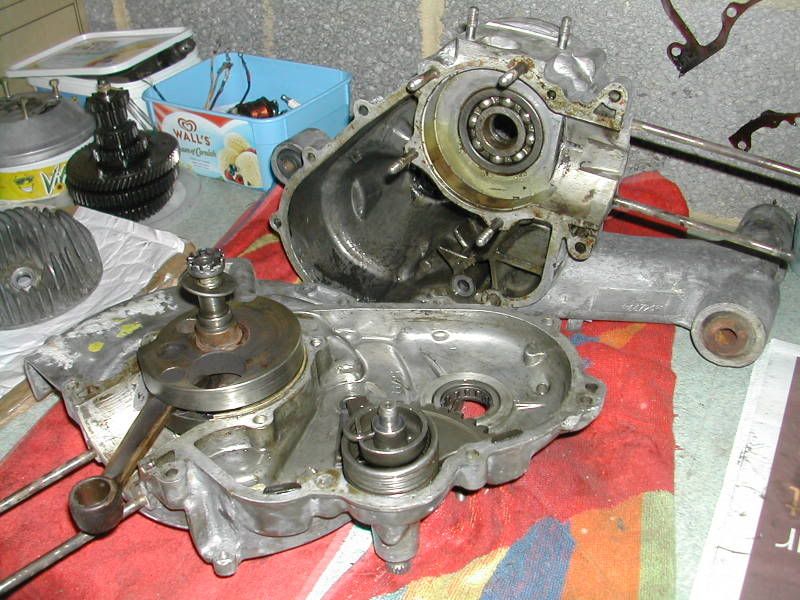 VBA has a deflector style piston, all later models use a domed piston, this barrel off the original scoot is on it's 3rd rebore, but usable.. 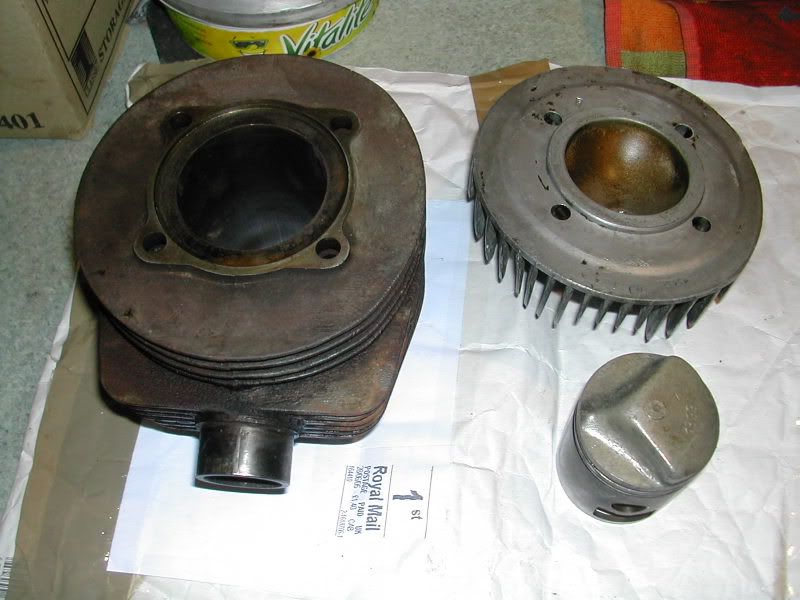 Have after much thought decided to stick with an original engine rather than putting a PX motor in it with 10" wheels (I dont want it to look like all those far east recreations we are seeing now), so have located another VBA 3 speed engine which I'm planning on converting to 4 speed, easy enough to do and will make it more rideable, still damm slow though, 45 - 50 tops! Collection of other shiney/refurbed bits.. 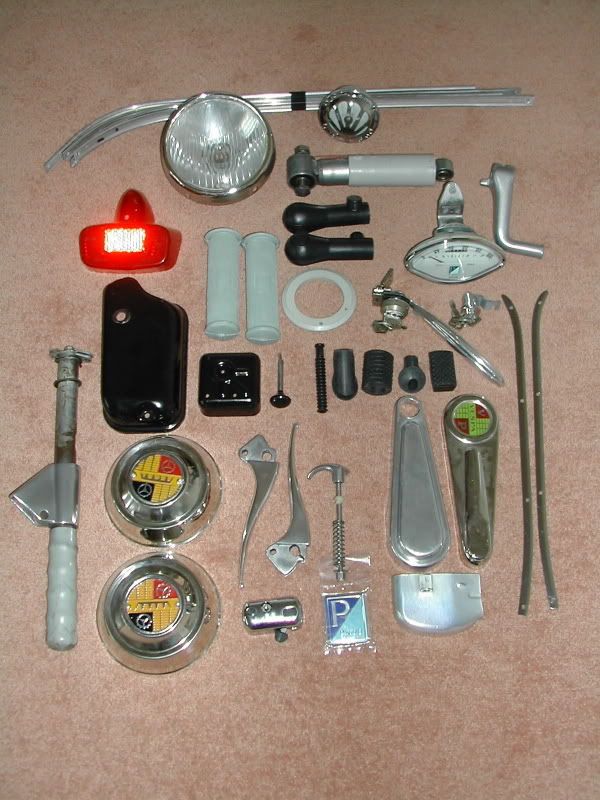 That's where I'm up to, I have pretty well amassed all the parts to complete it now, need to find a decent VBA rear light (smaller than the usual sportique ones) and a better headlight, apart from that just lots to do on the body before it goes to paint and of course the engine to sort... all good fun! ;D |
|
|
|
Post by Robjack on Dec 26, 2007 17:11:13 GMT
Nice one Bryno, good to see the progress. It's a good job there's people like you about, wish I had the patience/ability/time to do it.
|
|
|
|
Post by Rudi on Dec 26, 2007 20:54:00 GMT
nice curves the VBA has. even rusty it looks great...
i see you replaced the rusty floorboard. is this item custom made by you or an aftermarket item?
very nice work!
|
|
|
|
Post by bryno on Dec 27, 2007 9:41:08 GMT
Cheers guys, yep I've always liked the VBA body especially the bubble panels Floor panel was a replacement panel, it still requires a load of work to get it to fit particually where it meets the back of the body around the cable exits. This section was totally shot on the frame so the whole section was cut off my other frame and grafted in. Also hard to get a nice join at the legshields as the join is only single skinned, so you can't use much filler.. Replacing the floor is not generally viable from a cost point of view and really I should have scrapped the frame, but you know how it is once you get started on something.. ;D |
|
|
|
Post by mark on Dec 27, 2007 13:52:04 GMT
Nice one it looks great well worth the effort . I have an old mk 1 PX frame thats rotten but I will have to spend a few bob to get it right as it was a show winning scoot back in the day, sometimes it just has to be done. Thanks for the inspiration , I will tell my wife its all your fault. ;D
|
|
|
|
Post by Devo McDuff on Dec 27, 2007 14:01:03 GMT
Very impressive stuff that Bryno, keep us updated. Though wouldn't a Gino Ginelli carton have been more apt to store your shiny bits? |
|
|
|
Post by dto79px on Dec 28, 2007 14:55:36 GMT
loving the rebuild and nice to see someone wanting it original  |
|
|
|
Post by bryno on Dec 28, 2007 18:11:36 GMT
Must admit it has been a bit 'all consuming', but I feel I'm on the downhill stretch now.. err maybe Re originality, was a tough decision deciding what to do particually wth the engine, would have been easier and probably cheaper to slap a PX engine in, upgrade to 12v, use 10" wheels and hubs etc.. it would make it more rideable for sure, but then you don't see many VBA/VBB's still on 8" with the original engine, single saddle etc., so nice to be different ;D.. And I've still got my trusty T5 if I want to go fast and actually see at night ;D |
|
|
|
Post by jaz on Jan 2, 2008 20:59:18 GMT
It looks fantastic Bryno. After finding out Revival Scooters had the jig, I procrastinated and when they sold it I lost track of its whereabouts. Anyway, cheers for the heads up - I've emailed John tonight and hopefully he can help me too. My one and only New Years resolution is to get my 152L2 finished and on the road in 2008. Fingers crossed!
|
|
|
|
Post by bryno on Jan 3, 2008 21:15:28 GMT
Good to hear Jaz, John will do a good job on it I'm sure, decent bloke, did way more than we initially expected on my frame and was very fair on the budget.. how bad is the 152L2?
|
|
|
|
Post by jaz on Jan 3, 2008 22:16:53 GMT
Good to hear Jaz, John will do a good job on it I'm sure, decent bloke, did way more than we initially expected on my frame and was very fair on the budget.. how bad is the 152L2? It's a basket case I sort of inherited a few years ago - it's been owned (and crashed) by various members of my family since the early sixties. My uncle dismantled it in the mid-80s for a 'thorough overhaul' and it never got put back together! The frame is pretty much free of rust - not surprising as it had about 20 coats of paint on it - but it's twisted along the length of the frame and has lots of random dents and general legshield damage.  You can see everything I've done (i.e. not much  here here if you're interested. It's not going to be a big nut-and-bolt restoration, I want to keep it as original as possible. Part of what made me want to keep it is it's history and a full-on resto would destroy its 'character'. Like you, I'm not bothered about going to 10" wheels etc, as I have a *cough* Daelim *cough* to ride when I want to go faster. |
|
|
|
Post by bryno on Apr 7, 2008 10:02:00 GMT
Quick progress update.. Still working on it! since the frame came back from the major repairs I've spent soooo much time on the fine finishing, dry build etc, it's now ready to go off for paint, booked in for early May. Getting it to this stage has been a huge task, everything takes so long to get right, just prepping a set of stainless legshield trims to fit took a whole week of evenings to get right, frame looks like this at the mo.. 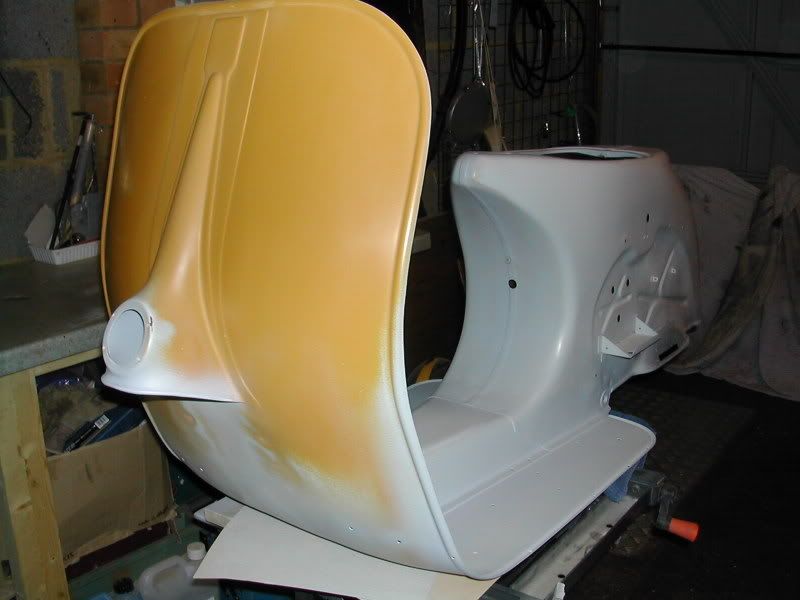 Picked up a second engine with 4 speed box, I can hopefully make one good out of the two, it will be a 2 port, so a bit on the pedestrian side!, this is the good un.. 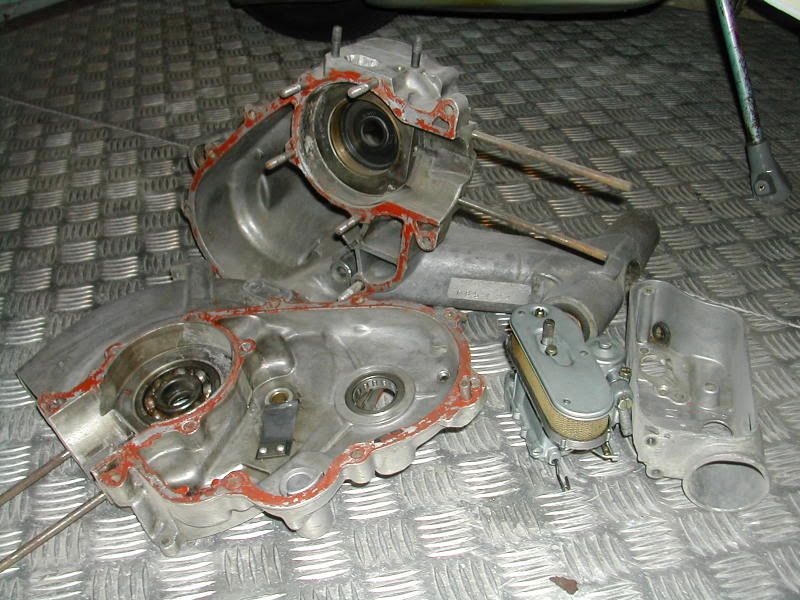 Needs new crank, rebore, all seals, bearings, gaskets, looking forward to getting cracking on this soon. Wife has been very tollerant it's amazing how many parts go into a Vespa! Side panels needed loads of work, but primered up are ready for paint now. 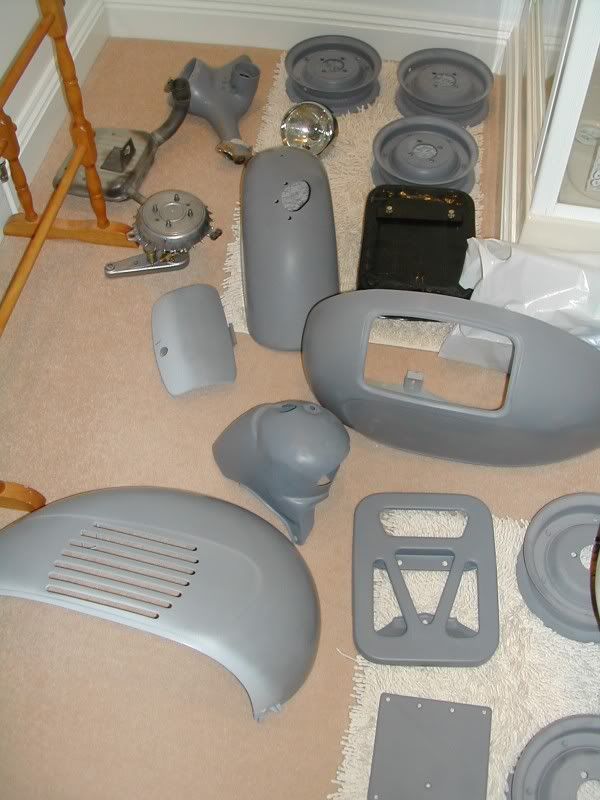 Nice find was a set of 3 GS150 (repro) wheels, these will fit on the standard 8" hubs with no mods, so if I do want to go to 10's, will be an easy switch. Also got a stand to match. I now have a total of 8 wheels for it! ;D 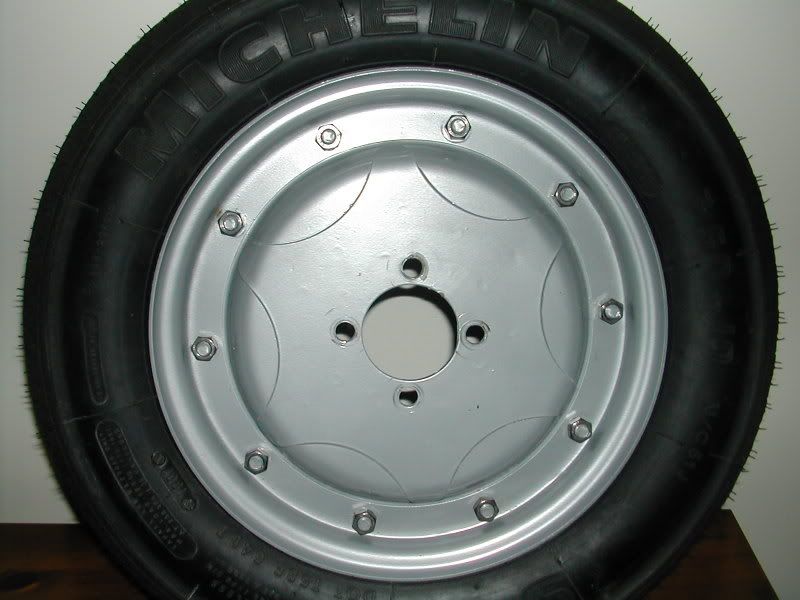 I've a load of bits in for zinc plating at the mo and believe I have amassed every part to finish the job now, still on the look out for a decent VBA style rear light, that's about it! Roll on May and getting the body in colour, then the fun of the rebuild begins! ;D |
|
satchmo
1st Class Ticket
 Back!
Back!
Posts: 98
|
Post by satchmo on Apr 7, 2008 10:13:52 GMT
Good work!! Love to see stuff like this  |
|
|
|
Post by mark on Apr 7, 2008 13:33:03 GMT
Ive been wondering how its been going nice one its looking good .
|
|
|
|
Post by jaz on Apr 10, 2008 11:44:27 GMT
It's going to be quite something, Bryn! I'm off to get the paint for mine later this week...
|
|
|
|
Post by bryno on Apr 16, 2008 7:56:08 GMT
Been struggling with what to do with the engine this week, I've a 2 port 150 4 speed now which needs re-building, been considering upgrading, spoke to someone about having a 3rd port cut etc, but it would create other problems in doing that.. Thing I'll just rebuild the 2 port and resign myself to a life at 45MPH for now Then if I decide to keep it, maybe build up that T5 engine I have sitting in the garage ;D |
|
|
|
Post by bryno on Jun 2, 2008 8:22:32 GMT
Progress update - engine is mostly built up, just got to close the cases and wait for my rebored barrel to come back.. Finally got the body in paint, suprising number of bits on a Vespa I've gone for Mini Pepper White which is fairly creamy, it's the colour used on the current Mini's.. 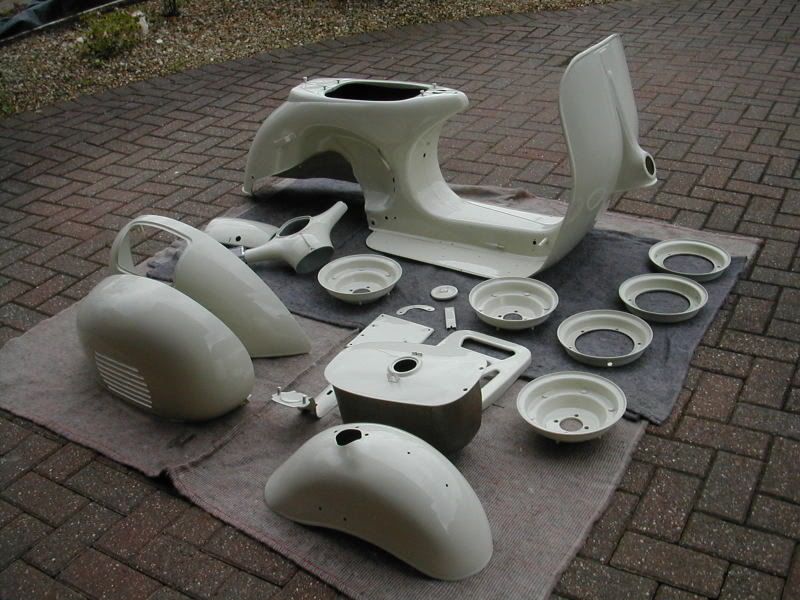 Back home, now the fun of reassembly begins ;D 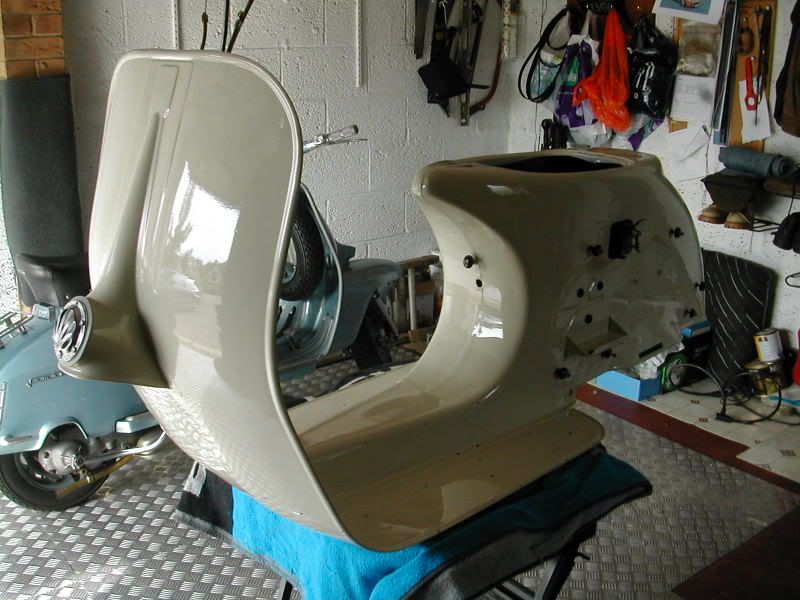 |
|
|
|
Post by bryno on Oct 22, 2008 14:24:10 GMT
It's (nearly) finished! This project turned out to be a real labour of love, after the paint was done i had a problem with cracking on the floor which involved a second respray, then when it was nearly built up, the cracking came back and I had to strip it all down again for some more welding and another respray.. I have put more time and money into it than I will ever admit! It now just needs some final fettling and will be ready for MOT.. 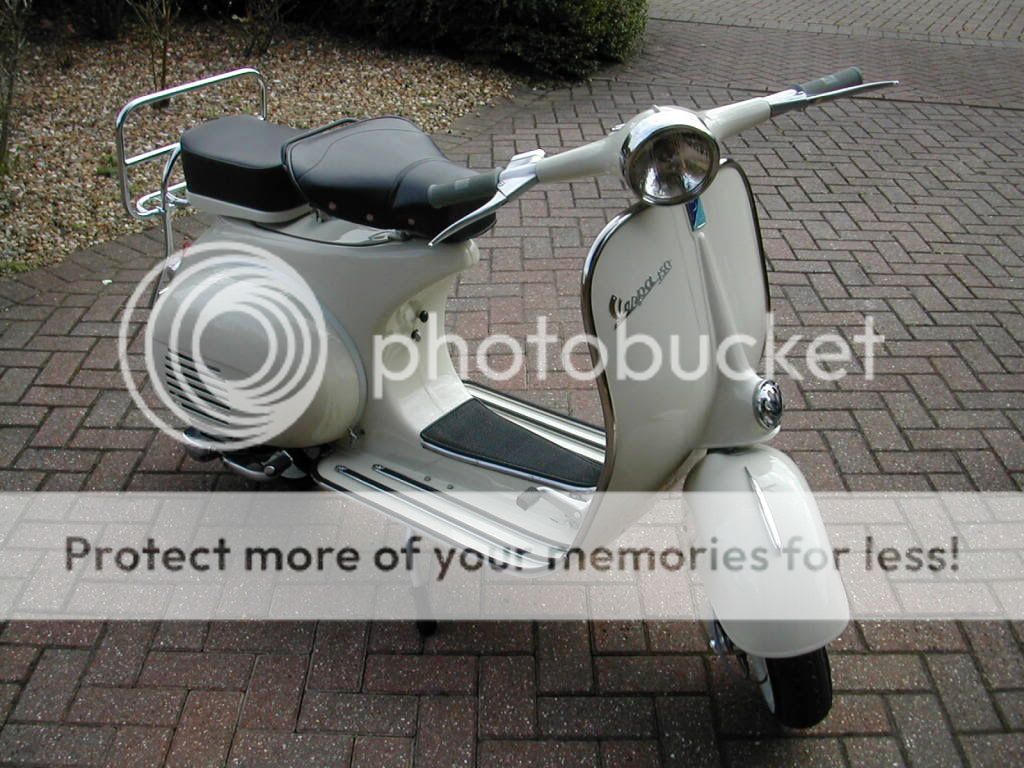 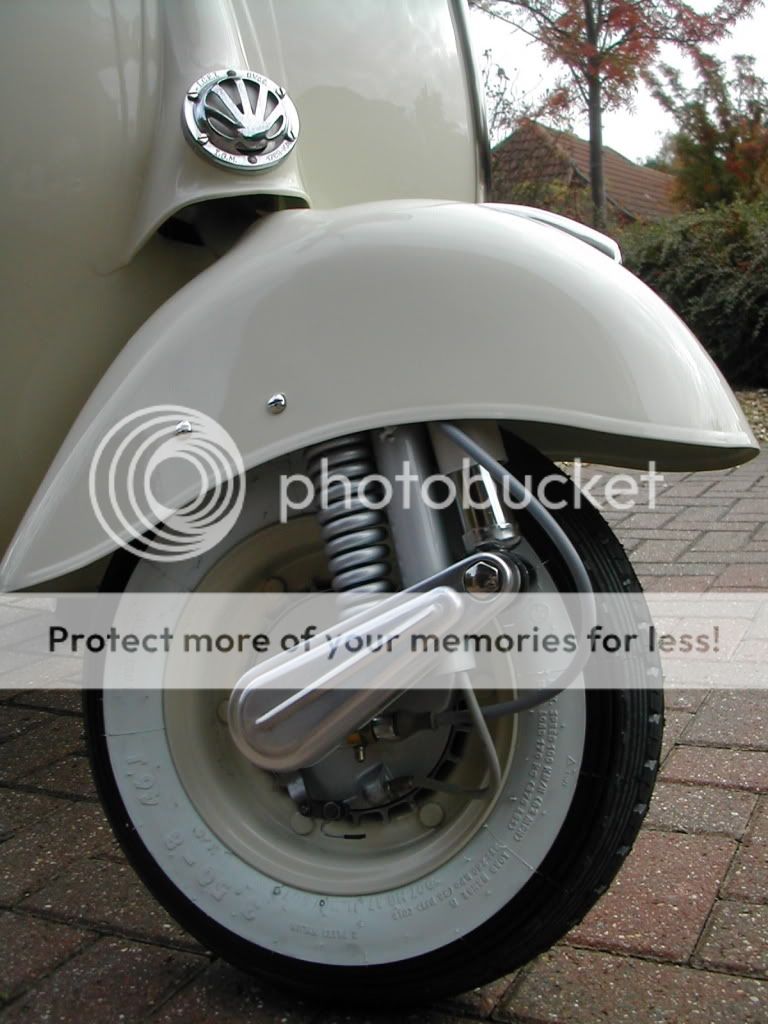    I'm pleased with the way it's turned out and I've learnt a heck of a lot doing it. Having said I'd never take on another restoration after this one, I've now foolishly bought another 2 equally challenging projects! |
|
|
|
Post by Devo McDuff on Oct 22, 2008 16:43:25 GMT
You're dedication has been worthwhile Bryno, a gorgeous scoot. Nice one.
|
|
|
|
Post by Robjack on Oct 22, 2008 17:41:49 GMT
Bryno, if I had a hat on, I'd take it off. Excellent stuff mate. |
|
|
|
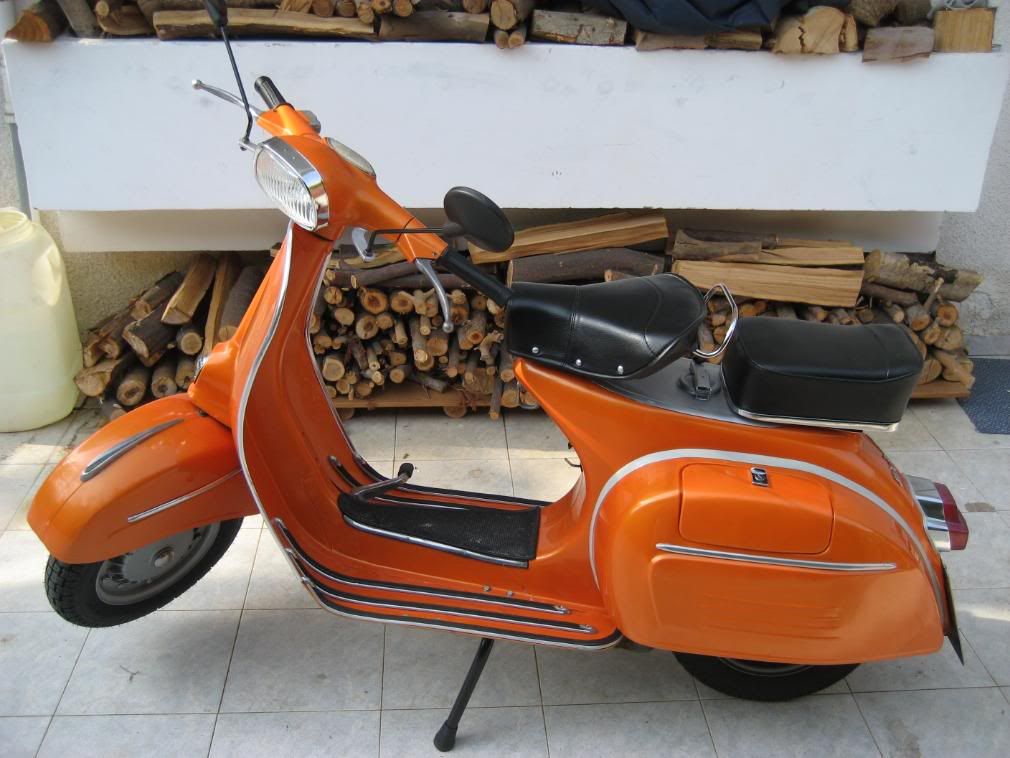
Post by jaz on Oct 23, 2008 7:40:41 GMT
Fantastic! I think this deserves a little side-by-side comparison... becomes Awesome. Don't expect mine to look anything like that good! |
|
|
|
Post by sirscootalot on Oct 23, 2008 18:31:56 GMT
beautiful scoot mate |
|
|
|
Post by Rudi on Oct 24, 2008 3:05:57 GMT
Bryno, gotta admire your patience
looks like brand new out of the factory
nice choice of color
great paint job and body work
and going into details
i assume youre taking a 3 week vacation after all this :-P
nice!
|
|
|
|
Post by bryno on Oct 24, 2008 19:36:05 GMT
Thanks all ;D I've now fitted the other side panel, changed the rubbers to black and today got most of the lights working... I'm pretty pleased with the way it's turned out but really it has given me more stress than my day job, seemed nothing went right, which is why I vowed never to restore another Vespa ever again so bought a non Vespa project a few weeks ago... .. then forgot all about that and bought another Vespa - happy days ;D Colour is Mini Pepper White, I think it suits it, the engine is an original 2 port motor, but I changed it to 4 speed to make it a bit more ridable. Engine was a pig to sort, I ended up with 3 engines and used the best parts from each! No idea what I'm going to do with it now, I can't see me using it really, suspect I will never actually run it in |
|
|
|
Post by Rudi on Oct 24, 2008 20:53:50 GMT
you said "I changed it to 4 speed to make it a bit more ridable"
did you mean to say 4 PORT..... or the VBA has less than 4 speeds??
another question - are those real rivets and drill holes that hold the vespa front emblem? how does it look on the inner side? nuts? some kind of washers?
|
|
|
|
Post by bryno on Oct 25, 2008 18:36:05 GMT
4 speed Rudi, the VBA is a 3 speed..
Yep, badge is riveted on, tiny alluminium rivets, the are squashed flat on the back, it looks pretty tidy on the inside of the legshields, very, very fiddly to do!
I also used dome head rivets for the floor runner end caps rather than screws.
|
|
|
|
Post by Rudi on Oct 26, 2008 3:09:40 GMT
thats a new one, 3 speed...didnt know that
as for the badge, i think ill just glue it or something, or maybe use 2 side adhesive tape
i dont see myself making drill holes after all that work on the paint... :-P
|
|
|
|
Post by mark on Oct 26, 2008 11:41:27 GMT
Looks fantastic well done ,I think you made the right decision with the 8 inch wheels superb |
|
|
|
Post by bryno on Oct 26, 2008 19:11:52 GMT
thats a new one, 3 speed...didnt know that as for the badge, i think ill just glue it or something, or maybe use 2 side adhesive tape i dont see myself making drill holes after all that work on the paint... :-P Yep, VBA was '59/'60 before the VBB/Sportique, loads of small detail diffs to the VBB, such as tank sunk in frame, 3 spd, no trim on the side panels, seamless mudguard, light on headset.. I bought a new badge before it was painted, of course the holes never lined up so I filled most of the old ones and drilled new ones before it was painted. If you have the old style riveted badge, a lot of people glue these on then cut the heads off the rivets and glue these on as well... I'm pleased I did stick with the 8's, though it caused me lots of grief as it meant sticking with a 2 port engine, it's really nimble though, and even Mrs BrynO can touch the ground on it |
|
stevec
2nd Class Ticket

Posts: 4
|
Post by stevec on Nov 2, 2008 21:41:51 GMT
Hello Bryno
what primer did you use for the frame, I have had a GS160 acid dipped and I am struggling to get rid of the residue, I have used davids zinc isopon 182 but it chips easily, that primer on your scoot looks solid. is it acid etch
regards
steve
|
|