|
|
Post by henri on Oct 22, 2014 15:40:12 GMT
erm ,dunno ,but if runnin a pinasco i'd be tempted by viton type seals ,as far as ive ever known the only diff in seals is the round or square cut outs above the oil hole ,not pulled apart enuff efl motors to know off this groove thats missing from memory ,
an sime as you guessed n vespaco agreed punching apart from stress relief (punchbag) on seals is to stop them being dragged round an by distorting slightly the metal holder jams em in the cases ,but as pxguru suggests its always best to seal em in with bearing locker , H
|
|
|
|
Post by pxguru on Oct 22, 2014 17:18:10 GMT
If its any help at all, I only ever fit the same, brown metal seals, in any motor. Once they are bonded (loctite 603)and dot punched they are not going anywhere. No matter how high it revs or how hot it gets. Taping the cases and screwing them in is a little extreme but I can see the point  The seal on the rotary valve pad is really not so important. As long as there are no side gaps and it takes a few seconds to empty the well of petrol its fine. |
|
|
|
Post by vespasco on Oct 22, 2014 18:06:59 GMT
Kool! Thats good enough for me..
Years ago i fitted a brown metal seal to my early cases with success (on the advise of others) and so replaced it with the same again but have a feeling i didnt use any loctite this time?! Dont know why not?! I hope to find out exactly what i done wrong at the weekend.
My arsenal of Loctite includes 641 retaining compound (bearings), 271 threadlocker (cruxiform, clutch nut and others), 243 lock n seal (seals)...(and Wurth Silicone Special 250 gasket cement). Ill probably revise that soon as ive nearly run out.
|
|
|
|
Post by henri on Oct 23, 2014 9:42:14 GMT
i think the brown 1's are the viton variety , it takes temp n oil/fuel better than black ones (nitol) , H
|
|
|
|
Post by vespasco on Oct 26, 2014 16:52:34 GMT
The story so far.... Ive tested the gearbox for leaks. Found that i had a slight oil leak behind the stator too...i thought it was from the drive shaft bush, in the fly side, which i repaired years ago with liquid metal...but after doing the test, with the top end still sealed, i found the leak was coming from the crank case bolt, to the left/above the said bush. It was also leaking from the other end of the (EDIT) *primary* drive shaft, though the joint/bush but no traces of any oil. The welds are good. The bush repair is still ok whuch is a relief. The clutch seals obviously still kapuut but now at least i know when i rebuild this engine i need to concentrate more on these 3 areas. Im also in the process of filling the crank with fuel overnight and seeing if leaks into the gearbox as i also suspect the crankcase/gearbox seal. Im just looking for somethung to colour the fuel to make it easy to identify. I used grease to help sealed surfaces/joints...and my thumb at some stages! It took me a few minutes to notice the tiny screw hole in my old/empty gear selector box leaking air! Interestingly, i tried with and without hub and it was sealed both times. Lots of soapy water sprayed onto suspect areas...at least they're clean now!! 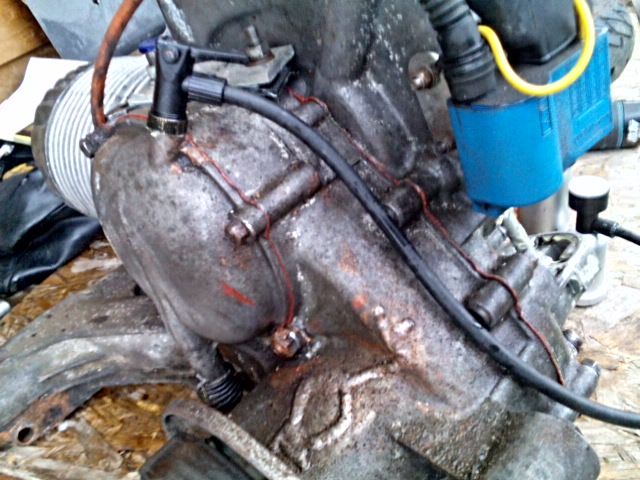 Another great improvisation!  |
|
|
|
Post by sime66 on Oct 27, 2014 7:44:37 GMT
Love the improvisation – I recall from another post you spent time in India, I imagine back-street garages looking similarly equipped; is that where you got your inspiration?
I expected the selector box to be tricky, but see you have that sorted, and pumping through the clutch cover; good plan. (Do I see a bouncy ball up the exhaust?)
You lost me a little describing where your leaks are, but you know where to keep an eye on, so that’s good.
Splendid job, keep at it, keep us informed; I have bailing twine, No. 8 wire, and Wellington boot repair wraps if you need to borrow tools!
|
|
|
|
Post by vespasco on Oct 27, 2014 17:29:06 GMT
Haha!
Its fair to say i picked up a few things; reinforcing puncture prone tyres with another cut down tube inside the tyre, splitting the engine in chassis, not worrying if the brakes dont work, cut a key for the toolbox lock, dont ride too fast, and that you dont need a fully equipped, spotlessly clean workshop (although i still want one of those)! Etc etc
Yes its a bouncy ball bunging up the hole!
Leaks are: one through a crank case bolt behind the stator and the other where the primary drive shaft bolts into the cases next to the clutch cover.
And all that red gasket cement youcan see is there for a reason! Id normally use a little grease and a gasket on clean cases.
|
|
|
|
Post by sime66 on Oct 27, 2014 21:04:55 GMT
Your leaks make sense to me now, it was the primary drive one I hadn’t picked up on, but I’m clear now (I hadn’t thought of that one).
I noticed all the red sealant, and put it down to these casings being long-lived, multi-repaired and well-loved jobs. You’ve got to clean them all up again now of course.
Noted what you say about just grease & gasket on clean casing surfaces; mine just went back with paper gasket and grease, and grease and ‘O’ ring on clutch cover.
Keep updating……….
|
|
|
|
Post by vespasco on Nov 2, 2014 2:07:17 GMT
Ive split the cases again. There were no noticable signs of the clutch seal leaking. It was a bit difficult to get out actually. I didnt use any loctite. With the symptoms i had (lose of power at wot in 4th gear, but wot in other gears was ok), i wasnt expecting to see signs of a major leak. What i did notice however was with the clutch side of things... I recently fitted a bgm clutch after ruining my cosa mkll as i had no oil in my gearbox for one reason or another?! I hoped to get away with just a new clutch. Fitted the bgm. Immediately after i fitted the clutch, everything turned over by hand as it should, then when i started it, the clutch seal went. Or at least showed itself as the problem i had before! It went quite dramatically too! It sound like a steam engine, 'puffing' away out of the clutch seal and breather every now and then! Heres inside the clutch cover that, it clearly shows signs of a clutch seal failure (the black stuff sprayed inside)! 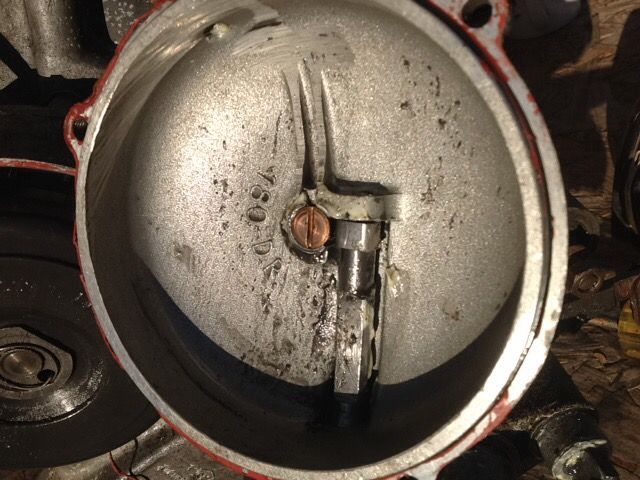 Well, when i first went to fit the bgm clutch i noticed the clutch spacer/oil feed cog would not engage with the woodruff key. Although i didnt notice it like that before when i took off the old cosa. 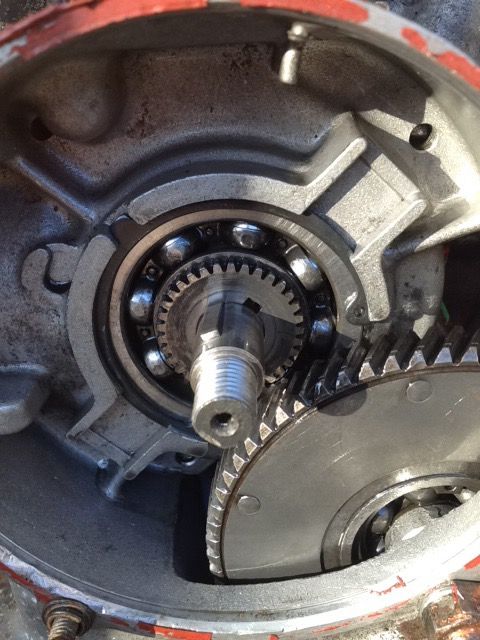 I figured one possible explanation was the crank was pulled too far over but it lined up with the centre of the cases and did not rub on the web. The bearing face of the crank was below the inner race of the bearing. The clutch washer/ spacer (i actually use an oil cog) measures at 3.7mm. The clutch certainly doesnt need to be packed out any more than it is. And its a very tight fit on the crank so was a bitch to get off....but i 'discovered' an easy way to pop it off without damaging anything and it came off quite easy....a large spanner (Not me! im not that large)! 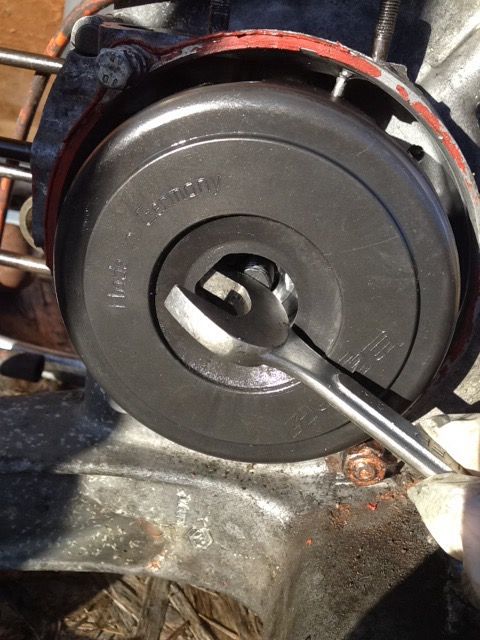 A similar kind of principal worked well on splitting the cases which were well stuck together with all that gasket cement (which i havent cleaned off yet)! I used the flywheel holder tool! This is how my full tool kit is so small  And to think I did actually used to believe that you need the right tools for the right job! Both f these ways worked really well without force or fear of snapping anything! Anyway....Do you think the spacer not being located with the woodruff has something to do with the clutch seals blowing?? Do you think the bgm clutch could have something to do with it? It requires tensioning to 65torques! Or did i blow up my engine, then by fitting the new clutch highlighted the problem i already had (blown clutch seal)? Or maybe i just done a sloopy job of rebuilding it the 2nd time?!! The loctite thread will come in handy anyway,im going to need more sealant on 3 x areas...c!utch seal, primary drive shaft/nut near clutch cover, 4 x crankcase bolts behind stator (although only 1 x is leaking the others will likely be just/almost as bad. |
|
|
|
Post by pxguru on Nov 2, 2014 12:20:28 GMT
Looks like its all going fine. Any pictures of the blown seal? If it was leaking past the outer edge as it wasnt bonded then probably nothing to see.
I think the clutch spacer is no issue. It can only be caused by the crank or the bearing. If neither need changing just put it back together like that. Your not using the autolube anyway.
Be sure to repeat the pressure test before it goes back in.
|
|
|
|
Post by vespasco on Nov 2, 2014 13:36:29 GMT
Before and after i even touched it I thoroughly inspected that seal for any signs of 'blow by', kinks, ill fitting, grooves, notches, signs of any heat build up or discolourization, it was evenly flush in the crankcase etc and seriously there was nothing i could notice. The pic i took for my records was out of focus  The only reason i use the autolube cog is because its the correct thickness. I noticed this spacer/keyway the first time i rebuilt it but thought the same...it should not have any effect on anything so i put it all together....then the clutch seal went again!! Probably just my sloppy rebuild? Although i cant see why the spacer would need to be engaged in the keyway if everything is torqued up...like you say,im not running autolube. im just trying to rule out the obvious and avoid another rebuild!! Ah yes! Now i have the technology (a rubber ball and an inlet blanking plate) i will be leak testing every time i rebuild!! Cheerz guru ji |
|
|
|
Post by vespasco on Nov 13, 2014 18:04:57 GMT
Its alive! Its alive i tells ya!! Started 1st (proper) kick. (Then again it always had). Ticked over nicely without any adjustments Darkness and rain stopped play Im not outta the woods yet tho', i do need to ride it... I didnt quite set the clutch cable properly so that needs adjusting before i can pop it into gear and ride off into the sunset! Note to self - connect back brake cable!!!!! I wasnt sure which thread to post this to!!? Ill update t'other thread. |
|
|
|
Post by henri on Nov 14, 2014 10:05:52 GMT
yeahoo ,gud news , an def remember to connect brake cable ,ive forgotten that one in my eagerness to test ride , happy-dazes , ride safe,H
|
|
|
|
Post by vespasco on Nov 15, 2014 19:52:00 GMT
Update... After my clutch fiasco, (see other thread) ive finally been able to actually ride it again  I could only manage 1hr at 1/4 throttle, as i couldnt bend my leg for more than a minute! I had to sit right back on the middle/rear seat to keep my leg straight as much as possible, so took it easy. I couldnt see my 'throttle gauge', too dark, but rpm and speeds indicated, 4000rpm - 41-42mph. After an hour i slowly took it up to... 6000rpm - 61-62mph It all sounded/felt good. (It didnt feel like more than 1\2 throttle @ 6000rpm) There was just a little pinging to begin, around 4500 rpm but Im sure i have the necessary parts/tools to iron that out and am sure ill be posing a few questions while im at it too. That was just one reason i didnt want a high compression kit. the pinging on a pinasco. They should rename the kit PINGfiasco, or KingPing or somethng. But i still luv it and would recommend it too!! The pinging will soon stop That was that for today. It was getting late/cold/foggy/misty/dark. Pain in the knee! Not a good time to be plug chopping anyway. Mañana. I noticed my light was shining too far up (it was dark by then) so tried to knock it back down a touch with my fist. Then realised i was hurting my precious!! Hahahaha! It repaid me by refusing to shine the dip beam! Its called karma man !! Ill sort that out when i change the clutch cable. I forgot, there's not much room in there with the sip black box for the sip speedo. Best not to hit it any more. Yet, i have to say, even although my 'the vespa' is genderless, i still love it!!!! Riding it, hearing it, feeling it...no annoying noises, purring away. Its what its all about innit??! I can feel a happy ending comin on ! Hahahaha! |
|
|
|
Post by sime66 on Nov 15, 2014 20:43:47 GMT
There is no happy ending, just temporary lulls in the despair when the cunning cow allows you to believe you’re on top!
I’m also in a lull from the despair; everything’s lovely, but I know she’s waiting to do something dirty, just when I’m beginning to trust her again.
But for the moment, yes, good innit!
Glad you’re winning despite ailments.
Keep the stats coming; I’m still squirreling away with them…..
|
|
|
|
Post by henri on Nov 16, 2014 10:51:00 GMT
what ya got ya timing set at ,i'm running mine 1's mostly about 2 degrees retarded from stock to get rid off pinking from modern fuel ,same on my missus's car ,an ive had to go for a low-compression head aswell as it was "pinking afwul",seem to remember sbwnic saying his scoot was eating pistons til he retarded his timing ,i think back to 15deg , H
|
|
|
|
Post by vespasco on Nov 16, 2014 12:04:13 GMT
Im hoping to check/tweak the timing today... Was set to 19° normally, i just lined it up to my oldmarks for now but its a matter of advancing it then slowly retard it until pinging stops, tweaking everything else as i go and keeping it as advanced as i dare. It doesn't have to be exactly/spot on 19° but it will help if i retard it a little. It only done it once or twice.
Ive got to plug chop, tweak it, etc as yet...which can all wait until i can bend my leg.
Theres a few things that cause pinking/pre ignition, i justneed to eliminate/adjust them 1x1 ! Such as....
High compression
Low grade fuel
Incorrect ignition timing (normally too advanced)
Wrong heat range spark plug
Jetting
Squish band wrong design
Contaminated head (carbon/machine oil)
Etc etc....
I always use the high octane/premium '97' fuel to help eleviate the problem (plus theres less ethanol in it than the 95)
15°btdc ignition!! Wow thats low!! what kit was that nik?! Sounds like there was more than one issue there if it happened repeatedly. Starting with the basics... too hot plug, too advanced ignition, lean jetting, carbon deposits in combustion chamber.....what did you do to make it better?
|
|
|
|
Post by henri on Nov 17, 2014 10:09:08 GMT
if memorys right nic had stuck a sip2 on an jetted ,think his edible pistons was also to do with rally mileage/motorway thrashes , could be wrong tho, H
|
|


