|
|
Post by doulsy on Sept 23, 2015 11:49:24 GMT
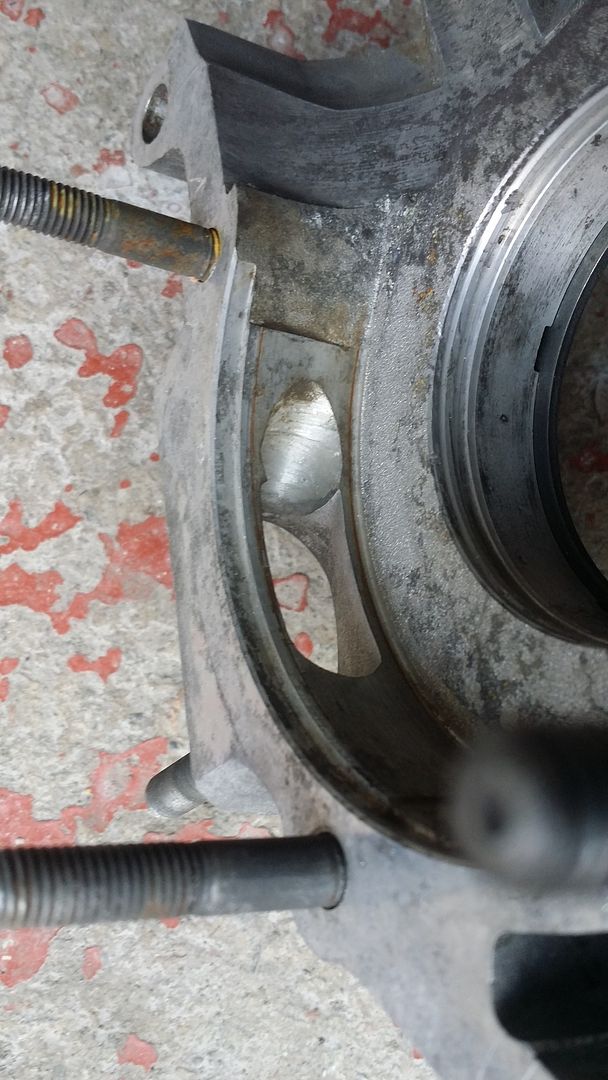
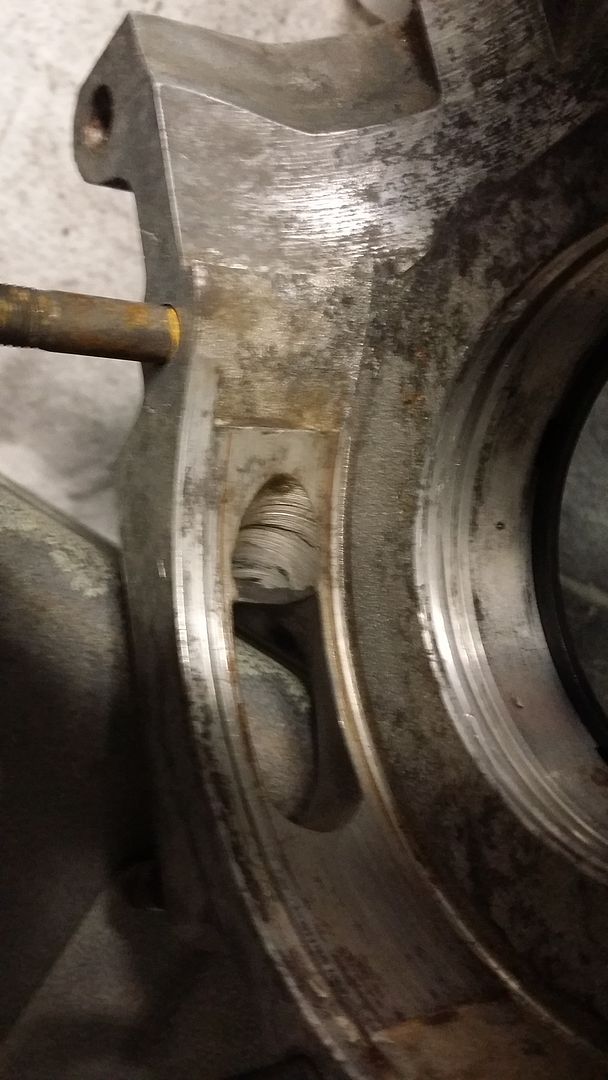
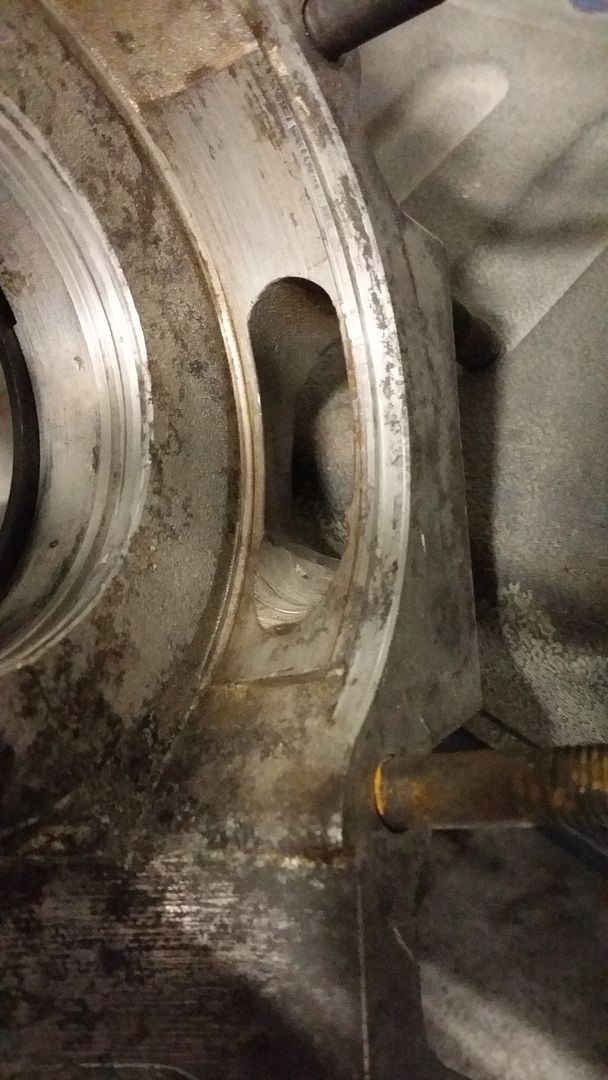
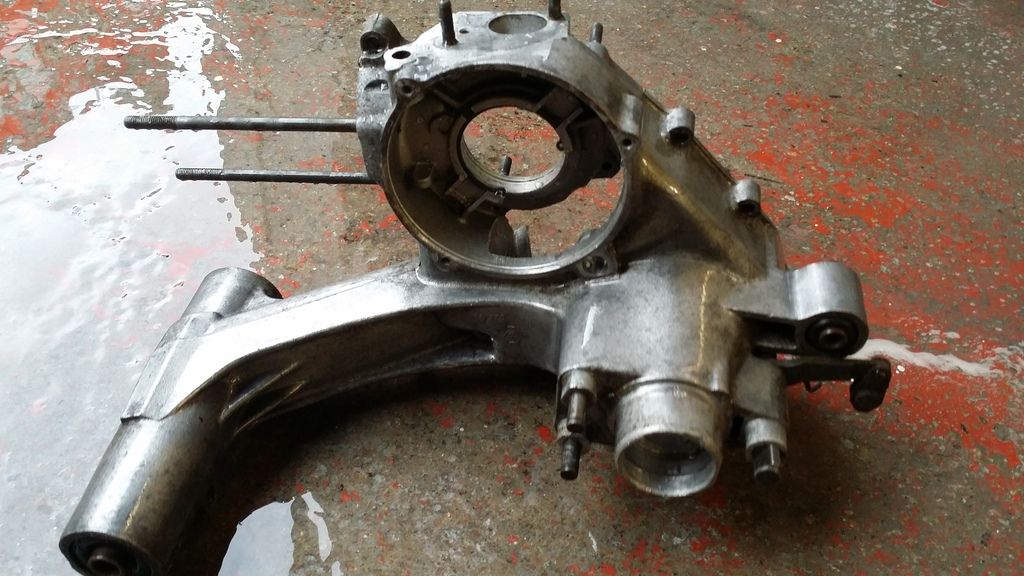
Bearing lubrication whole, are these only on older engines? I got the mot station to remove all the bearings with a press from my p200 engine cases and noticed the little whole, i googled it and came accross some reference but no images.it first i thought it looked suspect but a closer look revealed it looked factory.
|
|
|
|
Post by henri on Sept 23, 2015 15:02:13 GMT
above the bearing inside seal a hole in the casting web leading down to bearing , thats stock , if ya look at various seals on ebay you'll see they come with square or round cut-outs so they dont block the hole .its so 2 stroke deposited on inside cases is directed to drip onto bearing ,ok , H
|
|
|
|
Post by doulsy on Sept 23, 2015 15:44:16 GMT
Cheers henri, will post a picture when i get home for educational purposes
|
|
|
|
Post by doulsy on Sept 23, 2015 20:17:23 GMT
 still not sure how im gonna clean these cases up, was thinking a wet flatten with 1200 grit round were the bearings go, what could i use to soften up the dirt and rust? |
|
|
|
Post by sime66 on Sept 23, 2015 21:12:42 GMT
I looked at both mine, which, although they are only a year apart, are different casings – the double circlip main bearing on the 1982, and single on the 1983. They both have the oil hole on the flyside bearing. The only difference on this side of the casing I've noticed is the wiring tube from the stator is smaller on the 1982 casings. There is at least one other later casing – the one that has the internal hub seal – so I don't know whether that has the oil hole too; I imagine it has though. 1982 (old 2 circlip – PX-E) 1983 (single circlip – PX-EFL) 1983 (single circlip – PX-EFL) |
|
|
|
Post by henri on Sept 24, 2015 7:59:25 GMT
to clean old rust stained casings , i use a baby bath from a skip an big bottles of generic coke-cola from supermarket an limescale remover . they both contain phosphoric acid an eat away rust ,soak for bout a hour an then brass wire brush .dont use wet/dry on where bearings sit as you might remove too much casings .whatever you do dont use strong alkali's like caustic soda as they melt ali real quick . an to shift old oil/carbon i use same baby bath an hot water with washing up liquid .as hot as ya can stand it with thick rubber gloves on an then a poke into little nooks n crannys with a steam cleaner .the domestic type for tiling/grout etc an old toothbrushes/rounded old screwdriver as a scraper . rinse off washing up liquid with clean water as it has salt in it to soften water an then a blast of wd40 wiped over with a rag so ali doesnt fur up before being built .a long soak in parafin or diesel before hand always helps to soften crud an also free's seized bolts/nuts . H
|
|
|
|
Post by vespasco on Sept 24, 2015 14:37:33 GMT
Some bearings too have a little notch cut out of the outer race for the oil.
|
|
|
|
Post by doulsy on Sept 24, 2015 20:40:33 GMT
i have started cleaning them with a nylon brush, the crank chamber that was covered in rust has black patches under the rust and it feels a bit rougher than the non black patchy bits, im gonna try get a bigger basin and let them steep for a few days.
|
|
|
|
Post by sime66 on Oct 12, 2015 8:35:23 GMT
No idea if it's a good idea, or is too expensive, or too damaging to crucial surfaces, but if you're still struggling (how did the cola and limescale remover go?), have you thought about blasting? Saw this over the weekend and thought about your troubles:   ----Whats your inlet sealing pad like? |
|
|
|
Post by henri on Oct 12, 2015 16:29:19 GMT
its about 30-45 a set of cases to vapour blast ,an best done with old junk bearings in place , carbs are better sonic cleaned ,bout 20-25 a carb. dont try using the boots sonic denture cleaners to clean carb parts .the plastic there made of isnt petrol/thinners resistant an melts ,oops, took days to clean up after that experiment . if youve a compressor you can soda blast at home ,machine mart do a grit blaster gun for about £30 an local chinese supermarkets sell 5kg bags of soda crystals .god knows what the restaurants use it for , pickling alsatians probably. then youve the fun of cleaning up afterwards as the soda flys everywhere . H
|
|
|
|
Post by doulsy on Oct 13, 2015 18:58:41 GMT
Thanks lads, i have started cleaning them on my own with a nylon brush and some stuff i was given thats for cleaning engines, also using some washing up liquid and a small pressure washer, i took some pictures i will upload them.
Ps: whats a inlet sealing pad?
|
|
|
|
Post by doulsy on Oct 13, 2015 20:13:36 GMT
 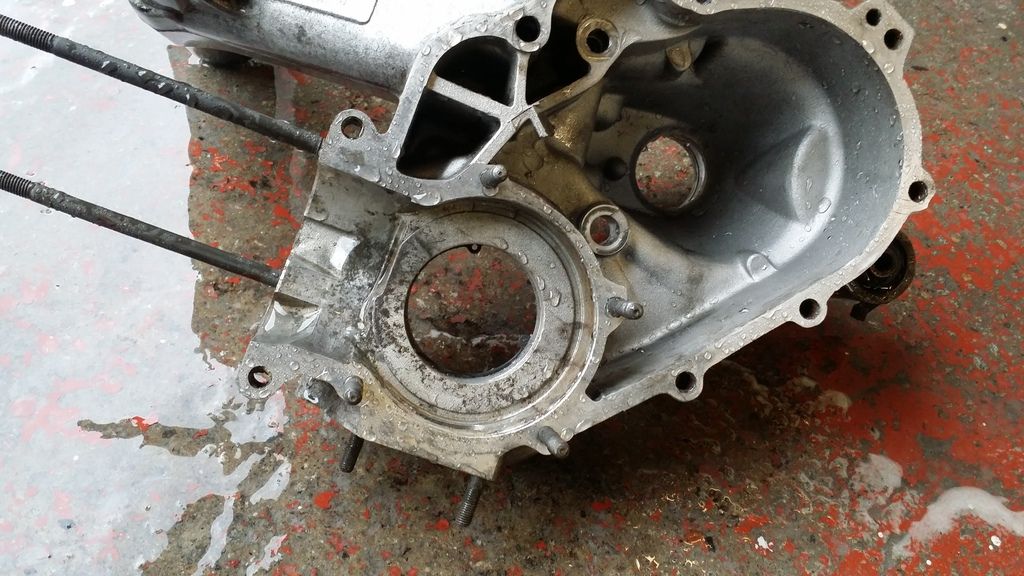 you see the black markings im talking about inside the crank case? you can actually feel them, im gonna try rubbing with a fine wet and dry, maybe 1200 grit. |
|
|
|
Post by vespasco on Oct 13, 2015 20:17:31 GMT
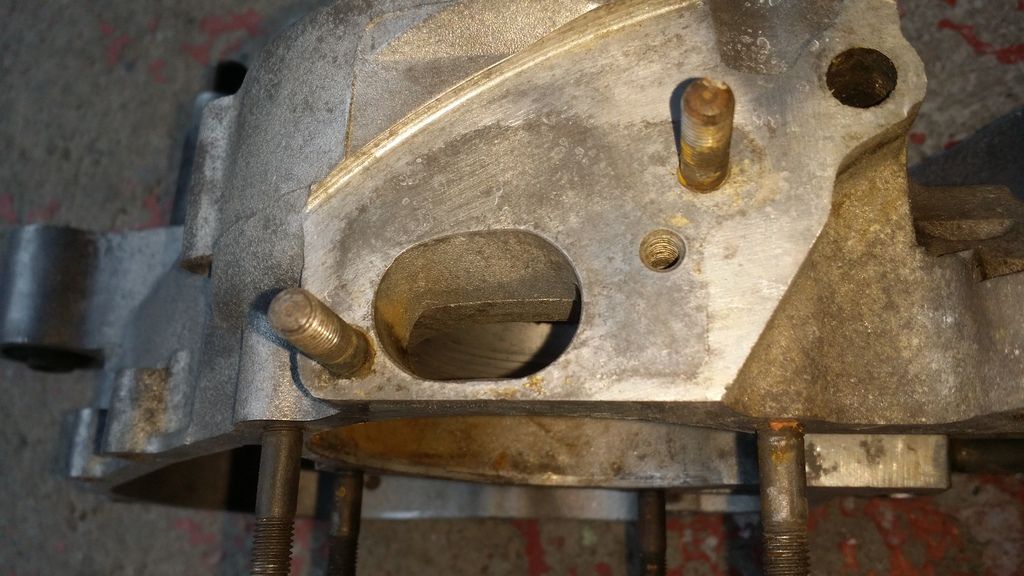
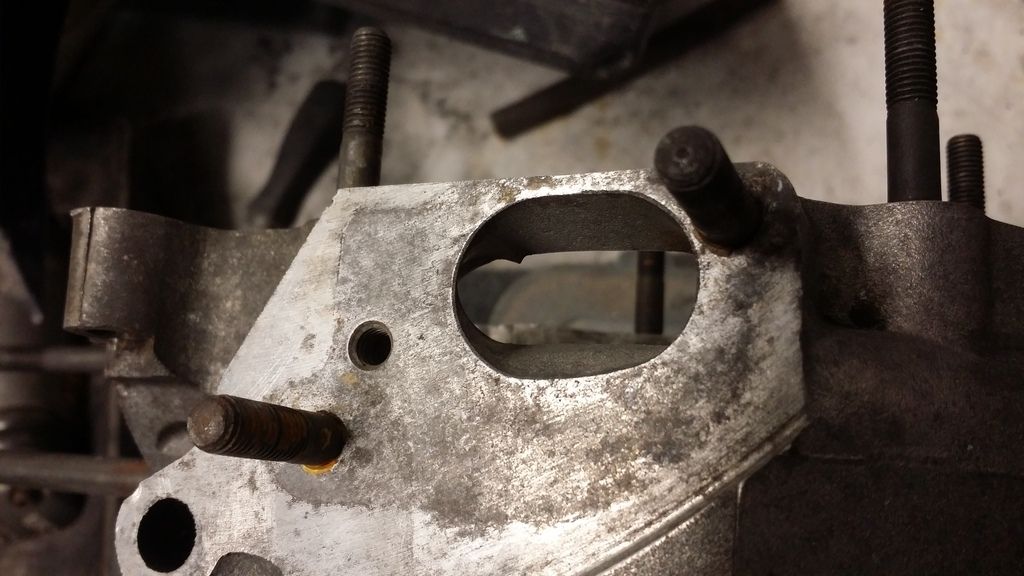
It's a grouping of seals, isntit Hang on, sorry, you said sealing pAd, inlet. On the lager half of the cases  look where the carb bolts on. Look inside the crank case, where the crank goes, at the bottom of said hole. Around this hole is a kinda raised section. This is the inlet sealing pad The pad that seals the inlet of fuel, at a certain, timed moment, using the crank web to determine the exact timing. It should be relatively smooth. Ie. No deep grooves. It doesnt actually seal it completely but it has to be tight enough to prevent a certain amount of fuel into the crankcase (at a certain given time) Hiccup! |
|
|
|
Post by vespasco on Oct 13, 2015 20:19:31 GMT
Hey i missed your post there! They dont look too bad at all doulsy! How's your elbow!  |
|
|
|
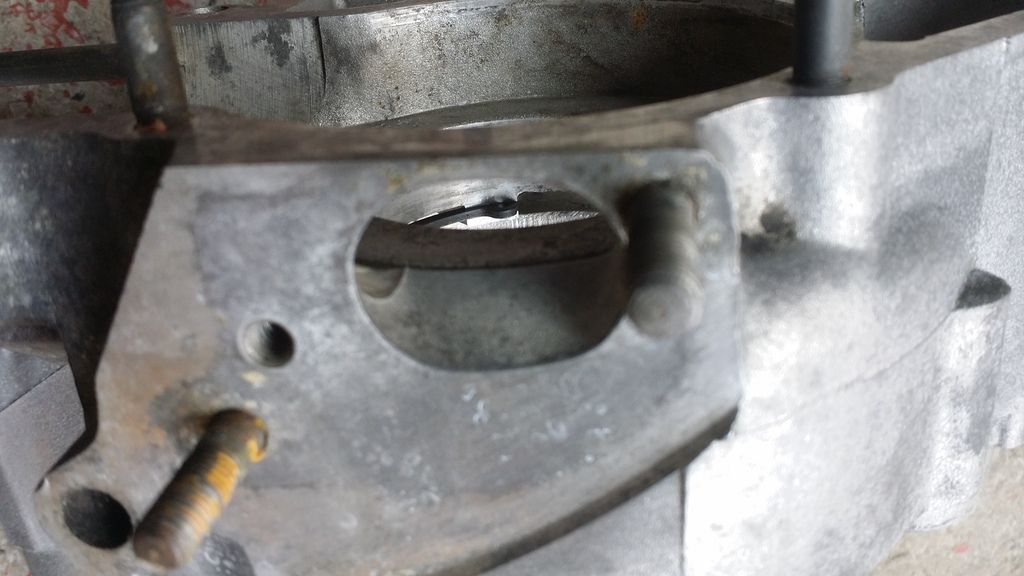
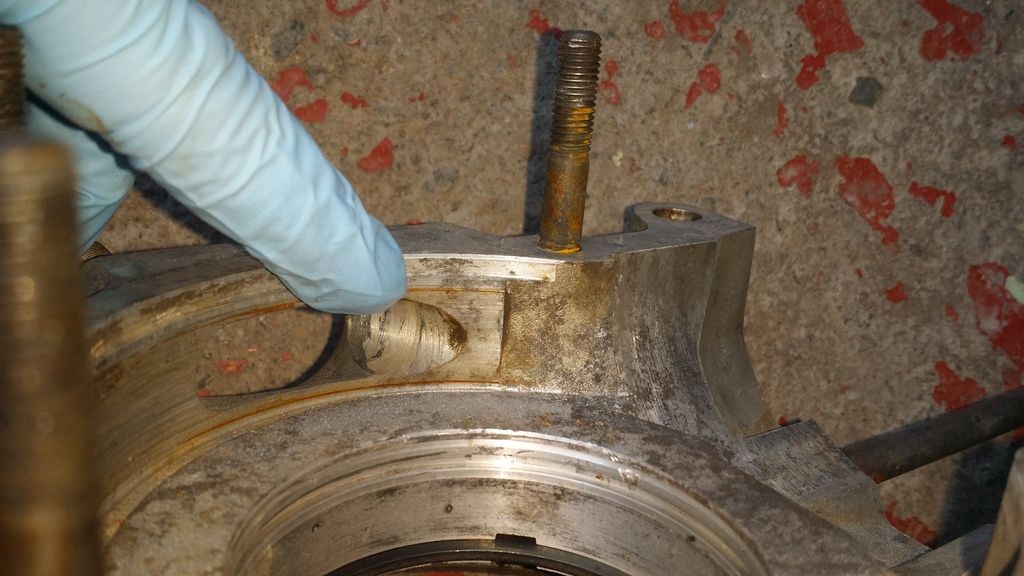
Post by doulsy on Oct 13, 2015 20:32:32 GMT
Hey i missed your post there! They dont look too bad at all doulsy! How's your elbow! i have tennis elbow lol, think i know the part you mean, the casing are in work so i will check it tomorrow although i think, i have allready looked as i gathered it was an important part of the casings. |
|
|
|
Post by doulsy on Oct 13, 2015 20:35:37 GMT
the bit between the 2 studs at the bottom of the second picture?
|
|
|
|
Post by vespasco on Oct 13, 2015 21:36:56 GMT
Yes!
|
|
|
|
Post by doulsy on Oct 14, 2015 19:32:28 GMT
|
|
|
|
Post by pxguru on Oct 15, 2015 2:40:55 GMT
Sealing pad looks normal and standard. That bit that looks like someone drilled it is actually done in the factory. You should be really happy with that sealing pad on an old scooter. Looks fine!
|
|
|
|
Post by henri on Oct 15, 2015 7:26:52 GMT
as pxguru said that pad looks good to me aswell , the rusty scratch ya fingers pointed at is probably old damage from a gone little end or cracked rings .as it doesnt reach from outer edge to opening it shouldnt affect the sealing of pad n primary case compression .ok,H
|
|
|
|
Post by doulsy on Oct 15, 2015 10:56:29 GMT
Thanks guys,was worried for a bit there, i will carry on cleaning then.
|
|
|
|
Post by vespasco on Oct 15, 2015 15:46:21 GMT
All looks standard. All looks good. Heres what i done to my inlet tract (the 'tunnel' between the carb and crankcase). 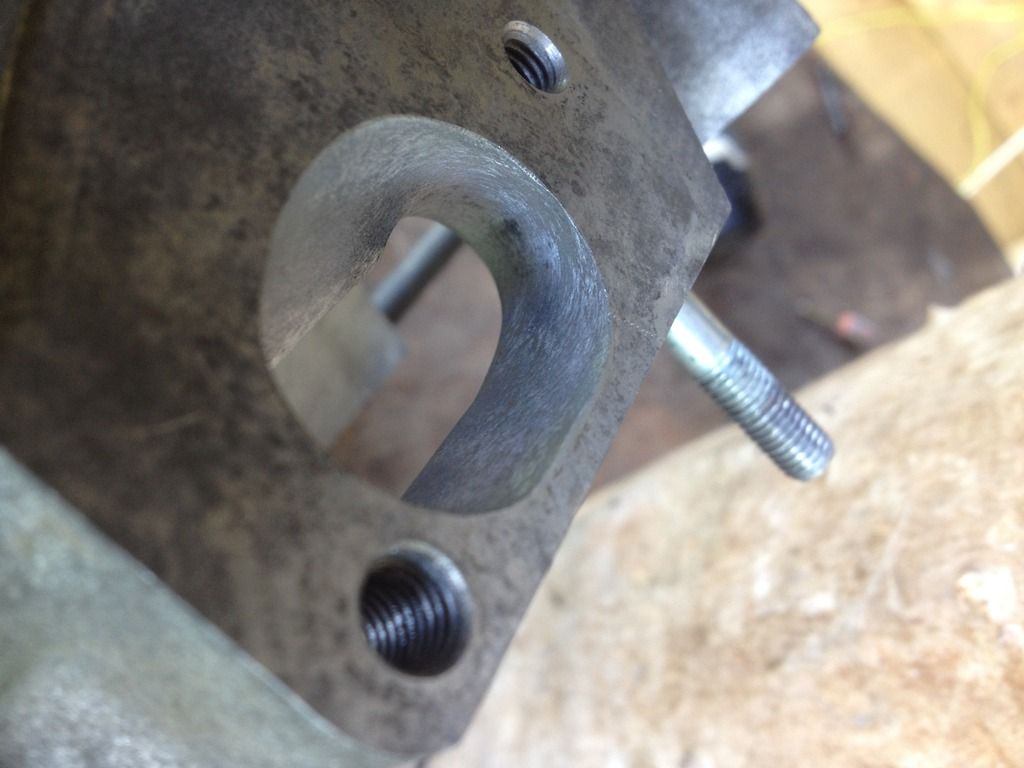 Im not suggesting you need to do the same but it would not hurt if you gave just a very quick rub with some fine wet n dry. Just to get rid of any sharp bits that maybe present on the sealing pad itself and also the inlet tract (the tunnel) Especially where that offest hole is. But if youre not too confident touching this area, no worries, leave it alone and it will still be fine. Out of interest, what year are those cases? |
|
|
|
Post by doulsy on Oct 15, 2015 20:32:49 GMT
cheers vespasco, i had been wet flattening anything that felt rough with 1000 grit wet and dry, doubt 1000 grit would make a difference to the part my finger is pointing at, was doing more cleaning tonight and i dont think i can do much more.
|
|
|
|
Post by sime66 on Oct 16, 2015 7:58:17 GMT
I was looking at your first photos of it last night, when it was all rusty with the old piston still stuck in; you've done a good job on these, and it's good to see an old motor get a new lease of life.
|
|


 look where the carb bolts on.