|
|
Post by doulsy on Jun 24, 2015 19:36:12 GMT
I have mentioned before on here that I plan to restore the original engine from my p200e this winter, the engine was full of water so i expect to spend a few quid on parts, any way and I have started to source parts and get familar with the vespa engine build dvd, thing is, I keep coming across, malossi and polini kits. My mind was made up to keep the engine standard but now I'm not so sure, is there real benifts with these kits? or should I just keep it as simple as possible?
|
|
|
|
Post by bryno on Jun 24, 2015 19:57:24 GMT
Only benefit is to go a bit faster, is that what you want?
If you do kit its a compromise, you loose economy and potentially reliability for the gain in power.
|
|
|
|
Post by henri on Jun 25, 2015 7:44:41 GMT
stay stock , an just build it careful/well , quite fast enuff for chassis/brakes ,with reliability aswell . H
|
|
|
|
Post by doulsy on Jun 25, 2015 12:39:04 GMT
Ok, i have made my mind up, i will stick with standard, cheers
|
|
|
|
Post by bryno on Jun 25, 2015 13:08:13 GMT
^ good choice, I run my '85 P200 as stock not even exhaust upgrade, used every day rain or shine never let me down, don't think twice about doing a 200 mile run on it, it does the job!
|
|
|
|
Post by doulsy on Jun 25, 2015 19:17:14 GMT
Managed to get a decent fly wheel from ebay for £22 delevered, mine has broken and bent fins, if anyone see's a decent crank and barrel can they let me know otherwise im gonna have to buy from SIP new.
|
|
|
|
Post by doulsy on Jun 25, 2015 19:44:31 GMT
another thing, do you guys clean the engine casings and parts like the fly wheel on your own or is it best to put them into a shop to get done?
|
|
|
|
Post by henri on Jun 26, 2015 8:47:55 GMT
clean ya stuff yourself ,or the shop will charge 30-50 quid an hour to do it , i ask for £50 to build a stock motor thats clean , £100 if ive got to clean it myself , hate cleaning stuff , luckily missus is a tad OCD ,so let her go at it with a toothbrush n scraper .only prob is it takes ages til she's happy with the job .
i use a old baby bath n gone off petrol from scoots ive resurrected,if lumps old/seized/rusty a soak in diesel brings it up an frees the nuts . inside cases i use my dads steam cleaner to blast old oil away ,an brake cleaner to blast bearings that are staying ,always blasting wd40 over afterwards to drive out moisture n prevent corrosion of steel/ali. H
|
|
|
|
Post by moomoo on Jun 28, 2015 7:15:08 GMT
Ok, i have made my mind up, i will stick with standard, cheers Hi doulsy, Are you going to post some before and after pics for us so we can see the transformation? Everyone loves that sort of thing! |
|
|
|
Post by doulsy on Jun 28, 2015 16:06:58 GMT
Ok, i have made my mind up, i will stick with standard, cheers Hi doulsy, Are you going to post some before and after pics for us so we can see the transformation? Everyone loves that sort of thing! Ok m8, i usually take plenty pictures anyway |
|
|
|
Post by doulsy on Jul 4, 2015 19:30:49 GMT
is there a way to clean the rust of the inside centre of this fly wheel? will a wire brush on a drill be ok?  Edit: after looking at other p200e flywheels on the net, im not so sure this is one, i was told it was a 200 flywheel for non electric start, hope you guys can clear this up. |
|
|
|
Post by doulsy on Jul 4, 2015 19:39:24 GMT
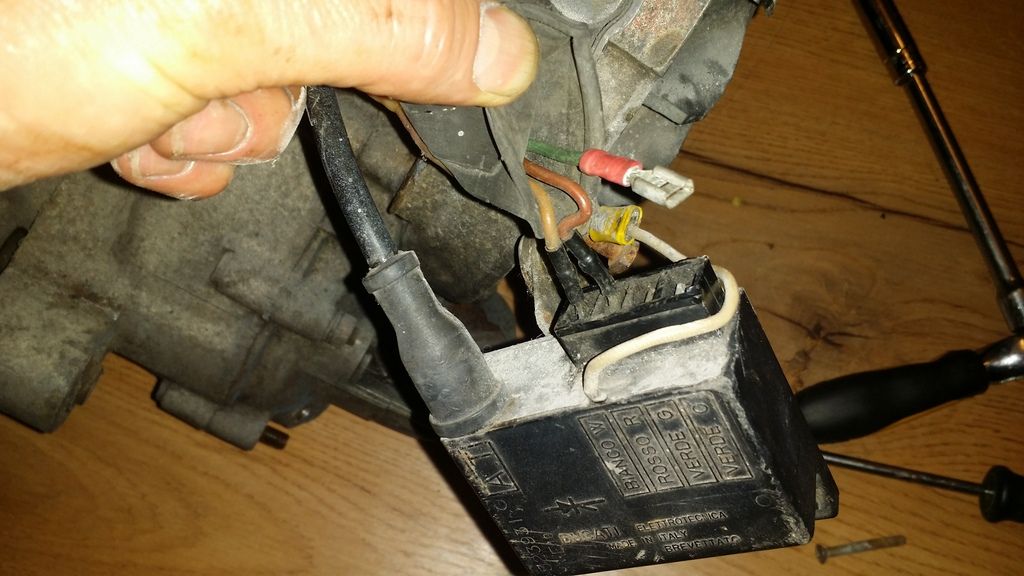
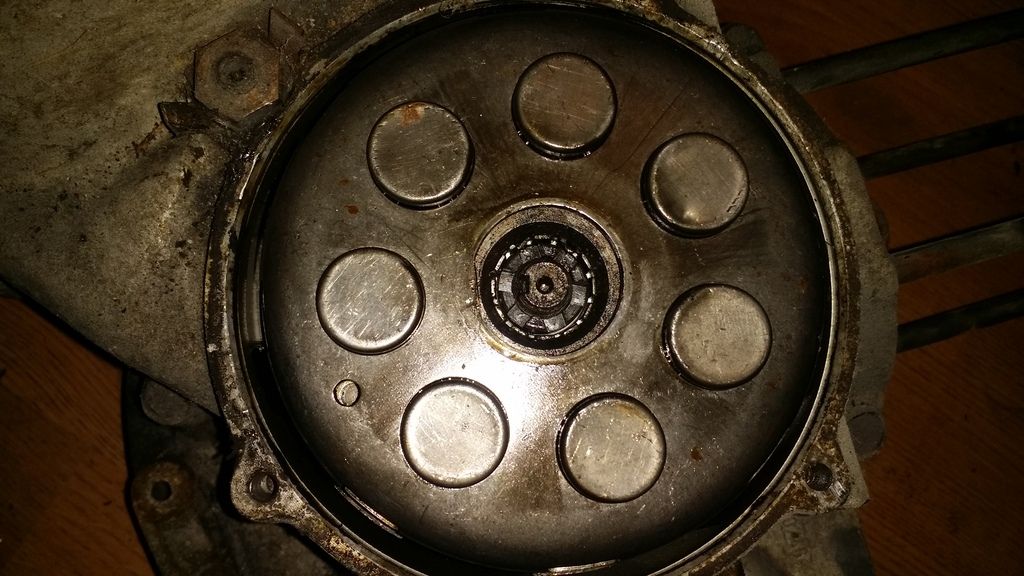
might as well use this thread as my engine rebuild thread, here is a picture of my engine after i removed the head, this engine has not been on the road since 1985-6, was in a shed for years but spent the last ten in a back garden along with the rest of my p200e, it had an old cover over it and going by the smell some cats must of slept there. 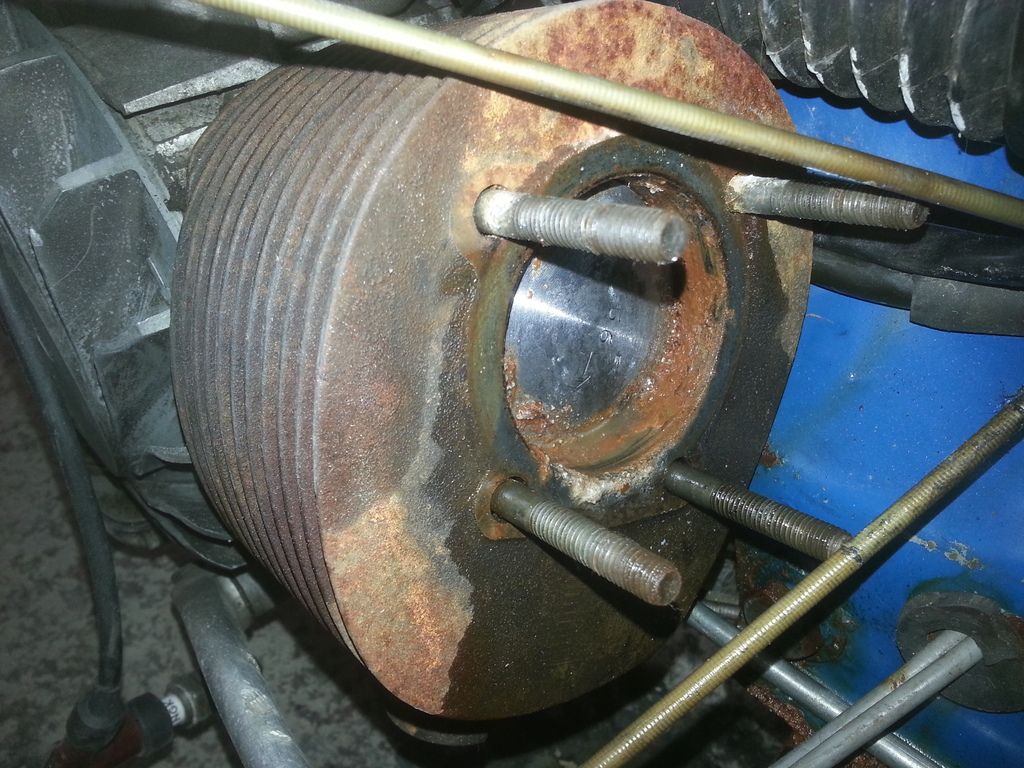 |
|
|
|
Post by henri on Jul 5, 2015 10:22:08 GMT
an used the barrel as a litter tray by look of it ,
the flywheel should have a piaggio mark n number on outside face if genuine , its got the cut-out/rubber bung for a points model ,inside the magnets should have a zig-zag overlap at one point for it to trigger the electronics ,an after wire brushing the rust off rub round inside with a ball of maskin tape ,sticky side out ,as the rust particles will stick to magnets n be hard to clean away ,
to free the piston n get the barrel off ,heated diesels the best, or a long soak with wd40 an heat ,its scrap n so's the piston so if worse comes to worse smash piston crown with a cold chisel so the barrel can come off ,or double nut the studs an withdraw them an split the cases then you can attack it from both sides , H
|
|
|
|
Post by doulsy on Aug 7, 2015 21:03:23 GMT
fly wheel removal? do you need that special tool or is there another way? have started stripping the engine and will upload some pictures for other newbs like me.
|
|
|
|
Post by djloone on Aug 8, 2015 5:27:39 GMT
Looking like the beginning of a epic build..keep the pics coming fella  LOON-E |
|
|
|
Post by henri on Aug 8, 2015 8:40:05 GMT
if fly n crank are scrap def there are other ways , but best to get a puller an a fly holder tools ,they aint expensive an are very handy to have around ,an will pay for themselves in long run , H
|
|
|
|
Post by hedgeling106 on Aug 8, 2015 22:41:32 GMT
Great youtube films of p range complete rebuild not to be missed. Propper scooter nerds . American not in italian for change, vespa motor sport channel
|
|
|
|
Post by doulsy on Aug 9, 2015 14:12:35 GMT
Great youtube films of p range complete rebuild not to be missed. Propper scooter nerds . American not in italian for change, vespa motor sport channel yes i have saw some of these videos, also bought the vespa engine rebuild dvds and ordered some special tools. |
|
|
|
Post by doulsy on Aug 11, 2015 21:14:49 GMT
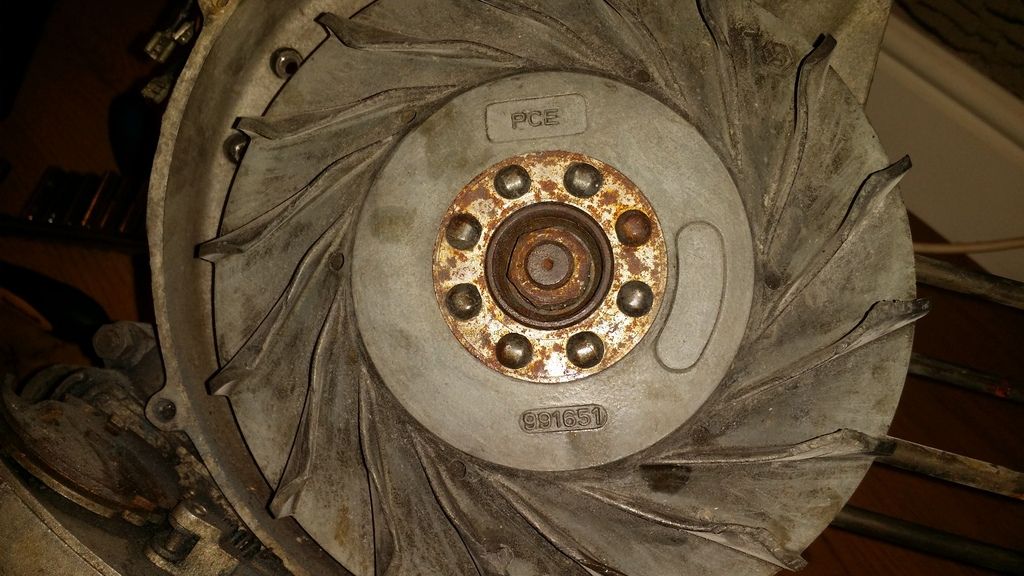
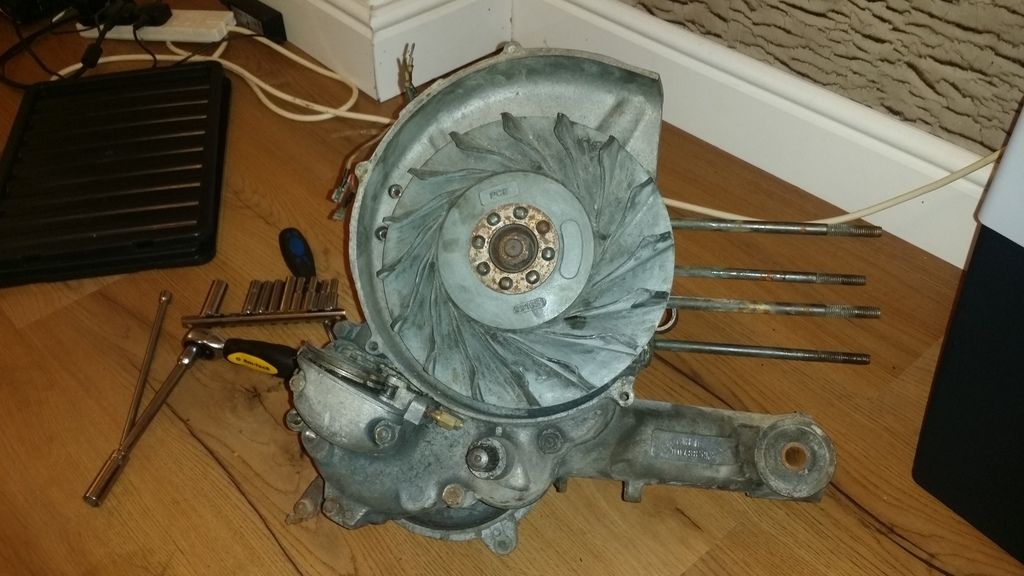
bought most of the tools i need to strip my 200 engine, a question for the wise ones on here, will the flywheel i got on ebay do i job, it looks different to me and the numbers on the wheel are not the same, one has the letters pce and the other dce, original looks far better in the inside but has damaged fins on the outside, well the real question is, have i wasted 25 bucks lol. 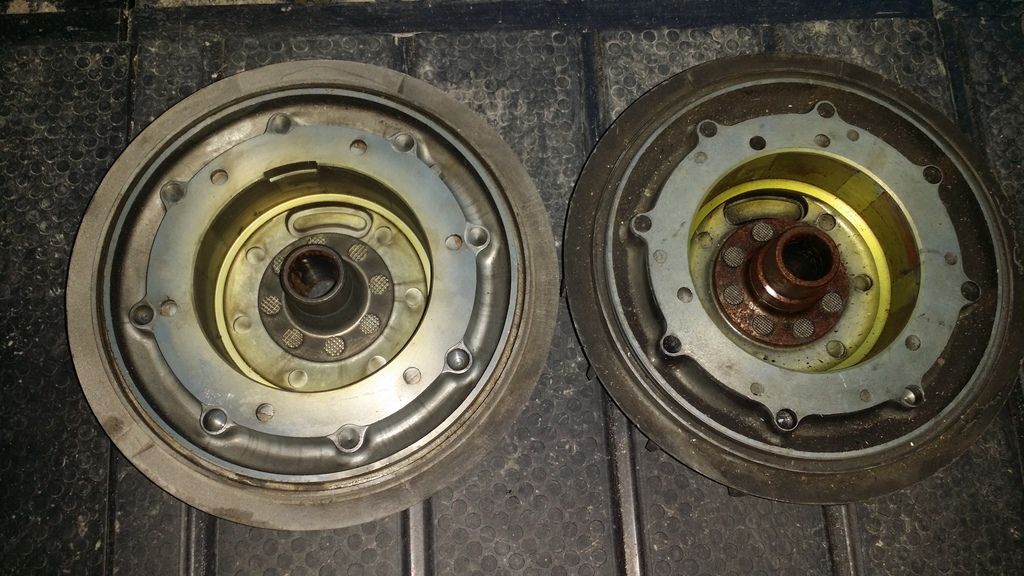 original is on the inside, pretty surprised how my engine looks considering the top end was full of water, i expected everything to be rusted up, pictures to follow |
|
|
|
Post by doulsy on Aug 11, 2015 21:20:55 GMT
|
|
|
|
Post by doulsy on Aug 11, 2015 21:22:29 GMT
|
|
|
|
Post by doulsy on Aug 11, 2015 21:32:39 GMT
|
|
|
|
Post by henri on Aug 12, 2015 8:40:32 GMT
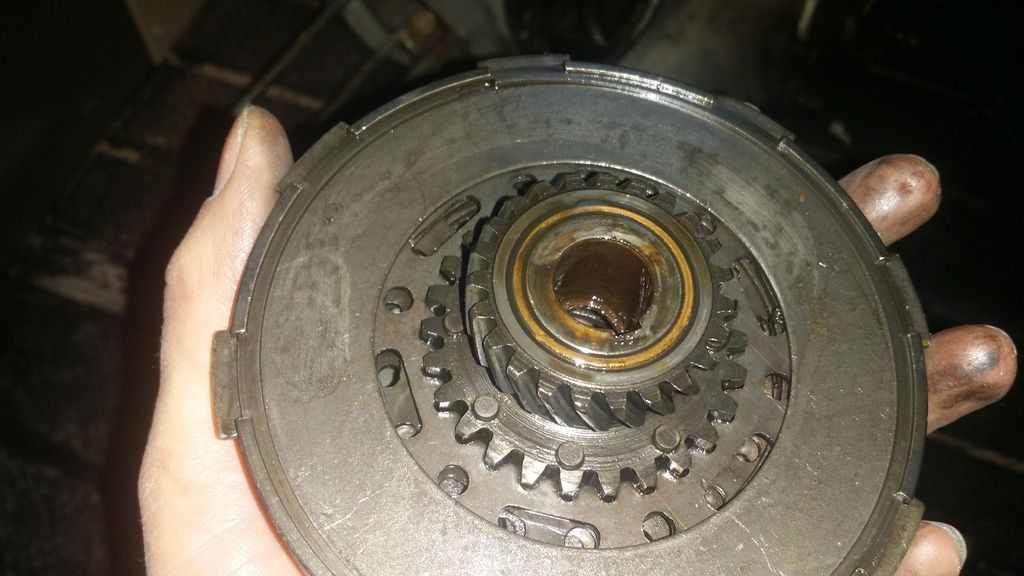
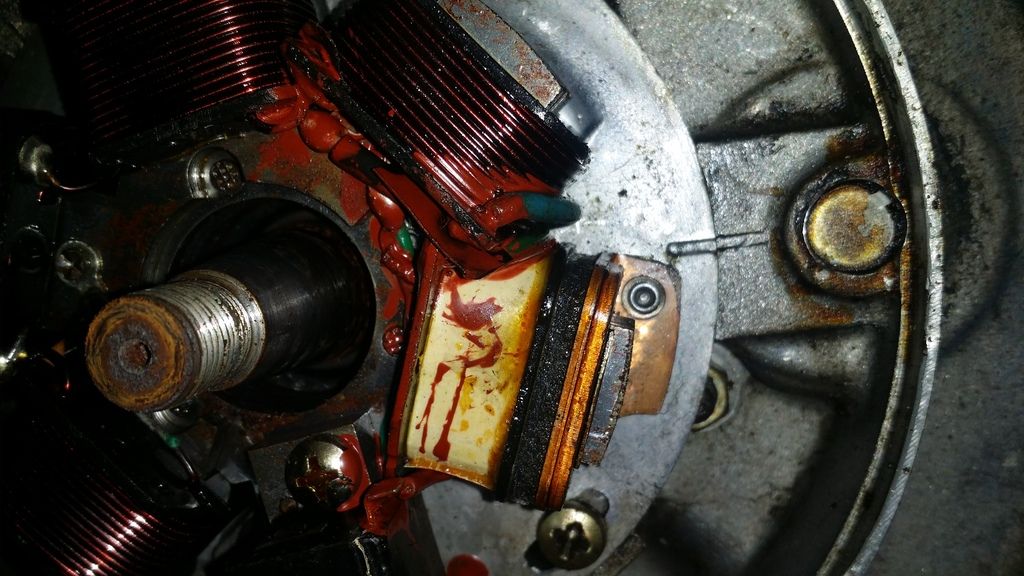
yep thats the mark , an i always replace stator n fly cover screws with cap head allen bolts/screws , there always chewed up an its easier to tighten up allens than cross-heads . looks like gears n clutch didnt get water/rusty from pictures so its just barrel an maybe crank needed . as for fly ,go with the one with best fins an cleanest rust free taper .not sure about differences in lettering/numbers , some research might be needed ,it might be as simple as the e bay ones a electric start 1 with gear ring removed ,bonus , H
|
|
|
|
Post by doulsy on Aug 12, 2015 13:41:24 GMT
I was told its from a non electric start 200 engine, the inside of the original is in far better nick and is a bit different only german forums or german ebay come up when i search for the numbers.
|
|
|
|
Post by henri on Aug 12, 2015 16:46:05 GMT
some german p series are different specs , the px80 for instance ,an there p200 n cosas being restricted to 10bhp , dont think that will make any odds to you using it , there all same taper n timing point ,so as above go with best taper n fins ,taper more important than fins , unless its got enuff chunks missing to unbalance it that is . to clear surface rust from taper lap it in with smooth valve grinding paste, dab a bit on crank n push fly on an move it round 1/4 turn either way, pull off turn a 1/3rd n push back on an turn 1/4's again , do that bout 3-4 goes ,no more an fly will be lapped to crank ,clean away all grinding paste stick the key back in an torque that sucker up , H
|
|
|
|
Post by doulsy on Aug 13, 2015 21:14:10 GMT
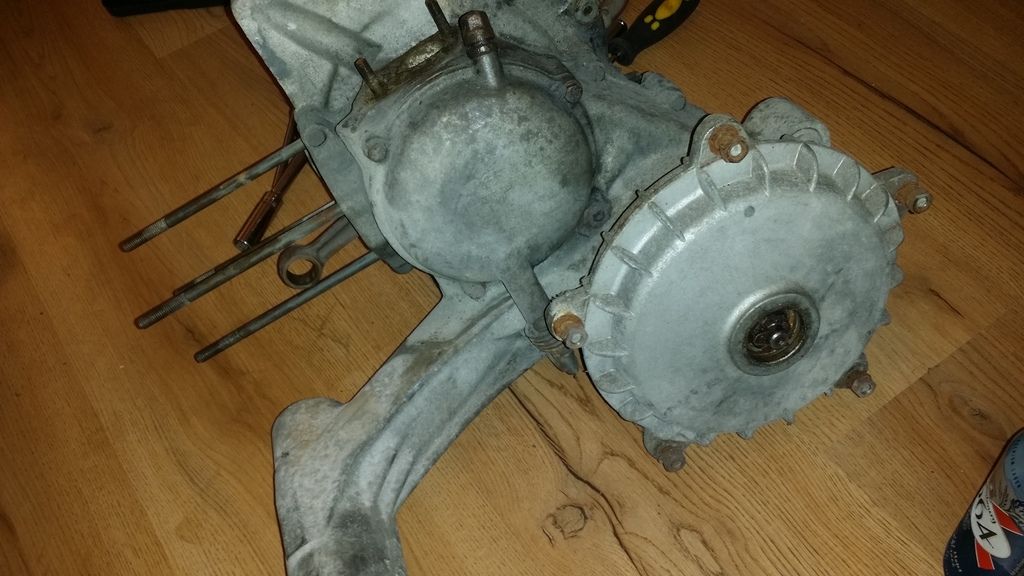
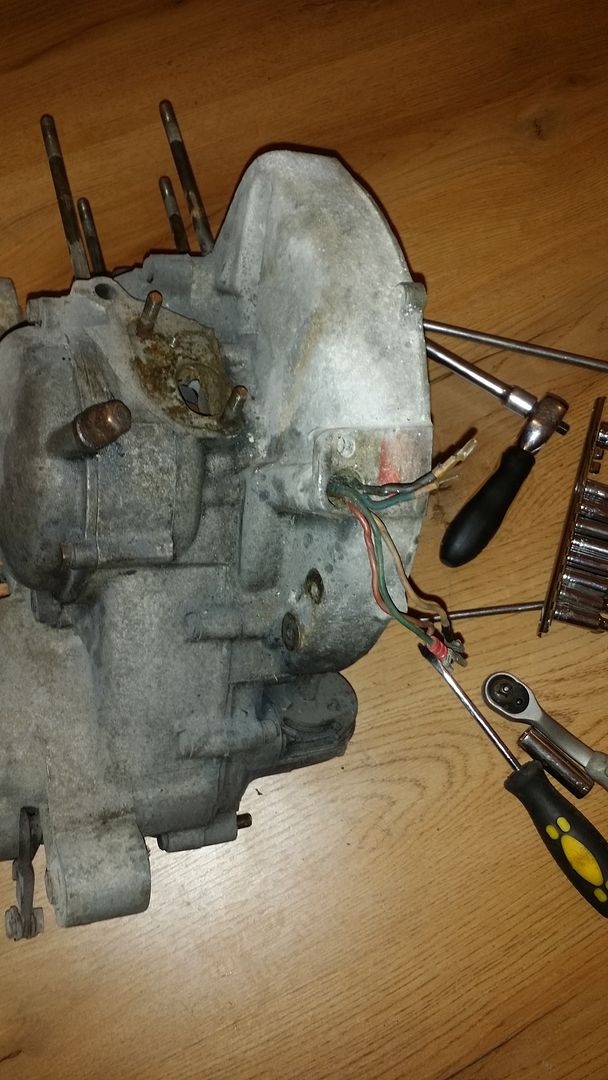
having a nightmare trying to split the case, watched the sausage dvd, dead easy just give the lug a tap, aye right, have a d bolt siezed and would not move, put the nut back on and hit it with a hammer, the nut started to move but the bolt never, not sure what my option are, i have left it soaking but i think i might need to drill it. 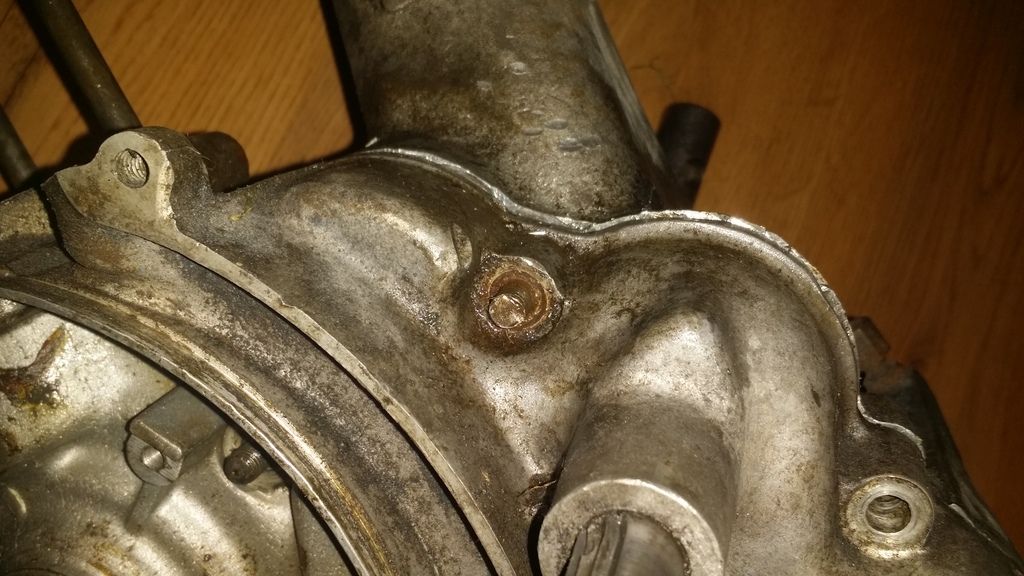 thought if i got the case to start to part it might of freed it, after hammering the lug for ages with no luck, i got a wall paper scrapper and started knocking it between the case's, it was working ok till i came to the area with the bolt, not sure if i have damaged the edges, seems pretty soft, can i repair it with some 80 or 120 grit? here is a picture of the damage...........  |
|
|
|
Post by pxguru on Aug 14, 2015 7:25:23 GMT
 This is painful to see. Don't stick anything between the casings! they will be ruined  Heat it up witha blow torch and hit it. If that doesnt work drill it. Totally normal on an older PX engine.
|
|
|
|
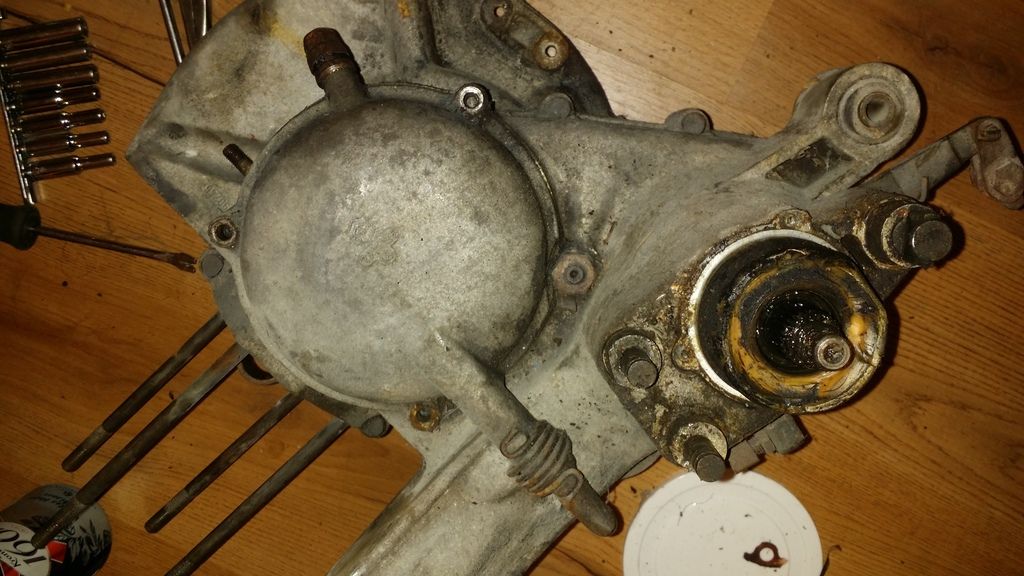
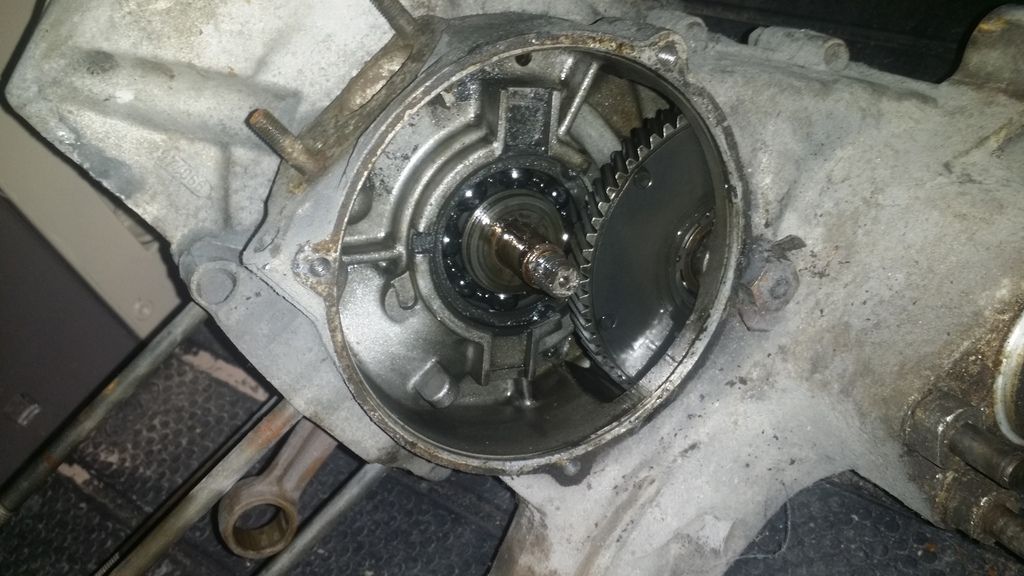
Post by doulsy on Aug 24, 2015 21:20:56 GMT
got the d bolt out using a heat inductor thingy in a friends garage, he says my cases should be ok even though i made an arse of it, some pictures of the split cases 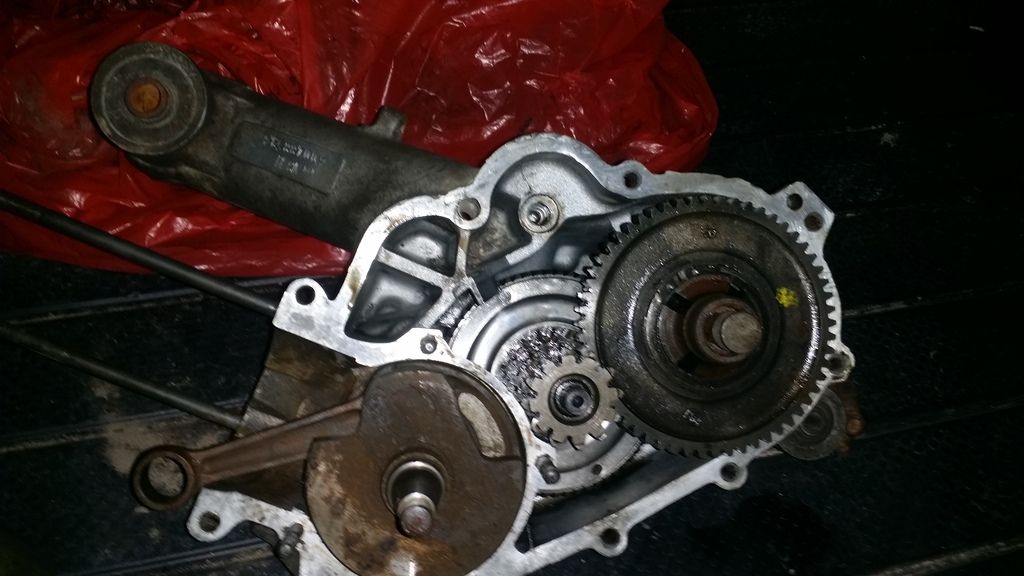  |
|
|
|
Post by doulsy on Aug 24, 2015 21:23:27 GMT
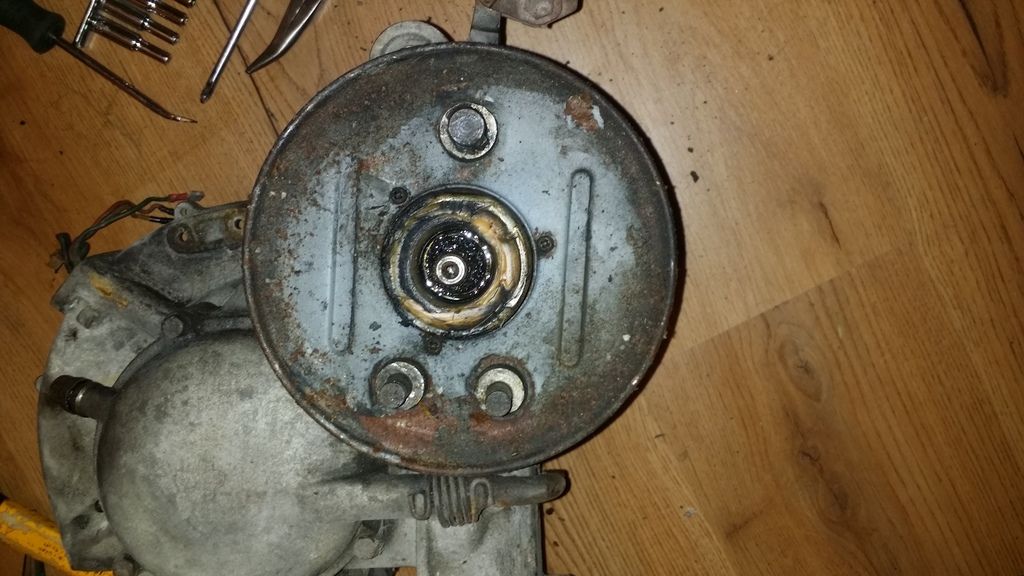
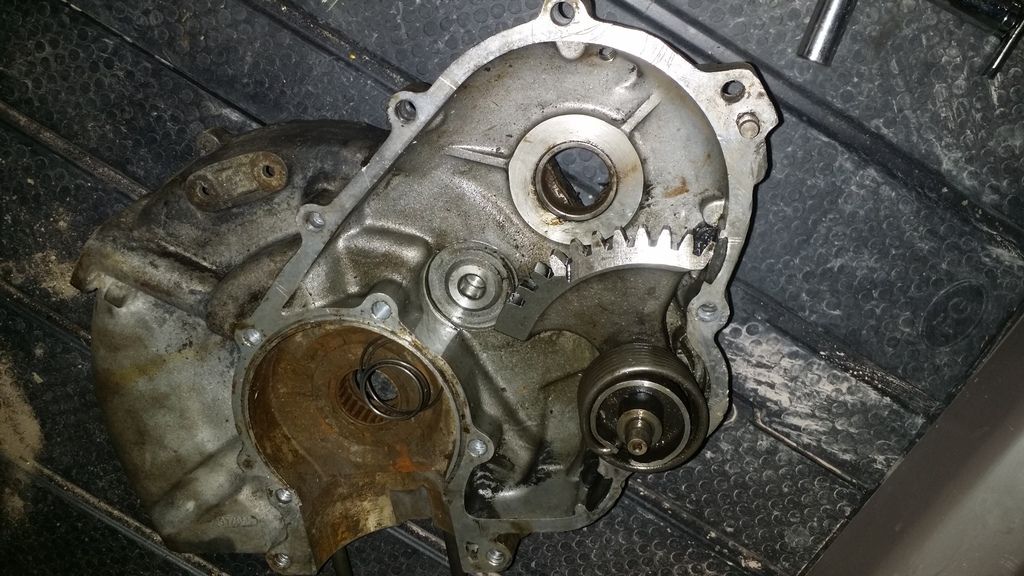 looks like the water only sat in the crank case |
|
|
|
Post by bryno on Aug 25, 2015 11:32:20 GMT
Yeh, that engine has spent some time sitting outside for sure, gears will clean up, need new bearings and crank, I'd not worry about the casings damage, the faces are quite broad, use some gasket sealer if you are concerned.
|
|


 This is painful to see. Don't stick anything between the casings! they will be ruined